Apache
Содержание:
- Testing the Installation 
- Testing the Installation
- История
- PGP Signatures
- Минимальные требования и преимущества
- Extensions
- Архитектура сервера
- Using _default_ vhosts 
- Upgrading
- 11 October 2019 — Nutch 2.4 Release
- Clients, Servers, and URLs 
- Копирование числовых ячеек из 1С в Excel Промо
- Совместная работа Apache с Nginx
- Файл apache2.conf
- Configuration Files and Directives 
- Обогащение данных — что это и почему без него никак
- Serving the same content on different IP addresses (such as an internal and external address). 
- Об устройстве кабины
- Hostnames and DNS 
- Apache Ozone: следующее поколение хранилища для платформы больших данных
- Сравнение Apache с другими веб-серверами
- Log Files and Troubleshooting 
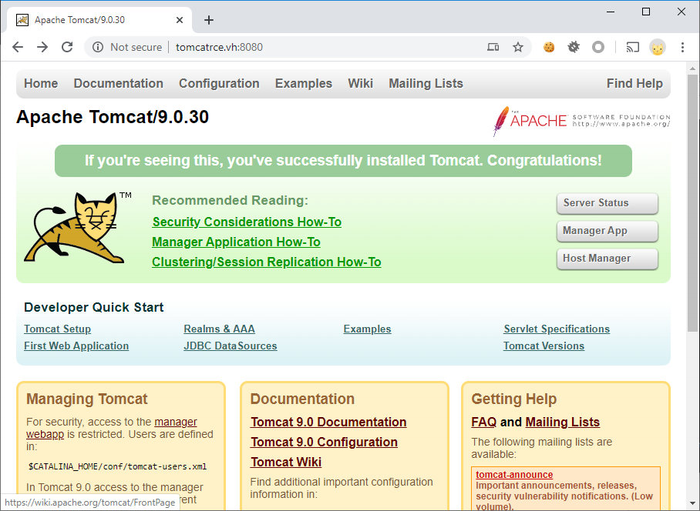
Testing the Installation 
After starting Apache (either in a console window or as a
service) it will be listening on port 80 (unless you changed the
directive in the
configuration files or installed Apache only for the current user).
To connect to the server and access the default page, launch a
browser and enter this URL:
Apache should respond with a welcome page and you should see
«It Works!». If nothing happens or you get an error, look in the
file in the subdirectory.
If your host is not connected to the net, or if you have serious
problems with your DNS (Domain Name Service) configuration, you
may have to use this URL:
If you happen to be running Apache on an alternate port, you
need to explicitly put that in the URL:
Once your basic installation is working, you should configure it
properly by editing the files in the subdirectory.
Again, if you change the configuration of the Windows NT service
for Apache, first attempt to start it from the command line to
make sure that the service starts with no errors.
Testing the Installation
After starting Apache (either in a console window or as a
service) it will be listening on port 80 (unless you changed the
directive in the
configuration files or installed Apache only for the current user).
To connect to the server and access the default page, launch a
browser and enter this URL:
Apache should respond with a welcome page and you should see
«It Works!». If nothing happens or you get an error, look in the
file in the subdirectory.
If your host is not connected to the net, or if you have serious
problems with your DNS (Domain Name Service) configuration, you
may have to use this URL:
If you happen to be running Apache on an alternate port, you
need to explicitly put that in the URL:
Once your basic installation is working, you should configure it
properly by editing the files in the subdirectory.
Again, if you change the configuration of the Windows NT service
for Apache, first attempt to start it from the command line to
make sure that the service starts with no errors.
История
Сервер был написан в начале 1995 года и считается, что его имя восходит к шуточному названию «a patchy» (с англ. — «заплаточка»), так как он устранял ошибки популярного тогда сервера Всемирной паутины NCSA HTTPd 1.3. В дальнейшем, с версии 2.х, сервер был переписан заново и теперь не содержит кода NCSA. На данный момент разработка ведётся в ветке 2.2, а в версиях 1.3 и 2.0 производятся лишь исправления ошибок безопасности. На текущий момент последняя версия ветки 2.4 — 2.4.23 (4 июля )
, для первой версии это 1.3.42.
Веб-сервер Apache разрабатывается и поддерживается открытым сообществом разработчиков под эгидой Apache Software Foundation и включён во многие программные продукты, среди которых СУБД Oracle и IBM WebSphere.
С апреля и до настоящего времени является самым популярным HTTP-сервером в Интернете. Статистика Netcraft показывает следующие данные об использовании Apache:
- в августе 2007 года он работал на 51 % всех веб-серверов
- в мае 2009 года — на 46 %
- в январе 2011 года — на 59 %, т.е. более чем на 160 млн сайтов
- в январе 2016 года — на 33,56 %, т.е. более чем на 304 млн сайтов.
Apache имеет долю рынка в России до 17,45 %. Это самый популярный веб-сервер после NGINX с долей рынка 64,89 %.
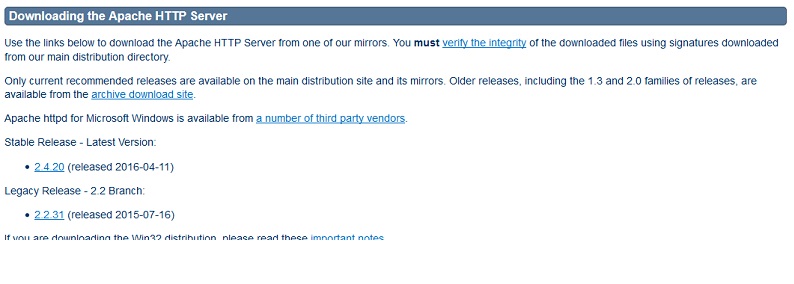
PGP Signatures
All of the release distribution packages have been digitally signed
(using PGP or GPG) by the Apache Group members that constructed them.
There will be an accompanying distribution.asc file
in the same directory as the distribution. The PGP keys can be found
at the MIT key repository and within this project’s
KEYS file.
Always use the signature files to verify the authenticity
of the distribution, e.g.,
% pgpk -a KEYS
% pgpv httpd-2.2.8.tar.gz.asc
or,
% pgp -ka KEYS
% pgp httpd-2.2.8.tar.gz.asc
or,
% gpg --import KEYS
% gpg --verify httpd-2.2.8.tar.gz.asc
We offer MD5 hashes as an alternative to validate the integrity
of the downloaded files. A unix program called or
is included in many unix distributions. It is
also available as part of GNU
Textutils. Windows users can get binary md5 programs from here, here, or
here.
Минимальные требования и преимущества
Apache получил широкое признание в сети, с 1996 года он является наиболее часто используемым HTTP-сервером. Достигнул своей максимальной доли рынка в 2005 году, когда сервер использовался на 70 % сайтов во всем мире. В последние годы его доля на рынке сократилась. Примечательно то, что для Apache такой спад не свидетельствует о непопулярности и деградации технологии.
Минимальные требования для эксплуатации:
- Процессор – Pentium.
- Оперативная память — 64 Мб.
- ОС-Microsoft Windows, GNU/Linux.
- Размер установки- 50 Мб.
Преимущества:
- Модульная конструкция.
- Открытый исходный код.
- Мультиплатформенная конструкция.
- Растяжимость.
- Популярность — легко получить помощь и поддержку.
Extensions
PHP
First , then follow one of the next three subsections below. Finally, test the installation as described in the final subsection.
Using libphp
This method is probably the easiest, but is also the least scalable: it is suitable for a light request load. It also requires you to change the mpm module, which may cause problems with other extensions (e.g. it is not compatible with ).
Install for PHP 7 or for PHP 8, as appropriate.
In , comment the line:
#LoadModule mpm_event_module modules/mod_mpm_event.so
and uncomment the line:
LoadModule mpm_prefork_module modules/mod_mpm_prefork.so
To enable PHP, add these lines to :
Place this at the end of the LoadModule list:
LoadModule php_module modules/libphp.so
AddHandler php-script .php
Place this at the end of the Include list:
Include conf/extra/php_module.conf
Restart using .
Using apache2-mpm-worker and mod_fcgid
This method provides improved performance and memory usage when serving multiple requests.
Install and .
Create the needed directory and symlink it for the PHP wrapper:
# mkdir /srv/http/fcgid-bin
# ln -s /usr/bin/php-cgi /srv/http/fcgid-bin/php-fcgid-wrapper
Create with the following content:
/etc/httpd/conf/extra/php-fcgid.conf
# Required modules: fcgid_module

<IfModule fcgid_module>
    AddHandler php-fcgid .php
    AddType application/x-httpd-php .php
    Action php-fcgid /fcgid-bin/php-fcgid-wrapper
    ScriptAlias /fcgid-bin/ /srv/http/fcgid-bin/
    SocketPath /var/run/httpd/fcgidsock
    SharememPath /var/run/httpd/fcgid_shm
        # If you don't allow bigger requests many applications may fail (such as WordPress login)
        FcgidMaxRequestLen 536870912
        # Path to php.ini – defaults to /etc/phpX/cgi
        DefaultInitEnv PHPRC=/etc/php/
        # Number of PHP childs that will be launched. Leave undefined to let PHP decide.
        #DefaultInitEnv PHP_FCGI_CHILDREN 3
        # Maximum requests before a process is stopped and a new one is launched
        #DefaultInitEnv PHP_FCGI_MAX_REQUESTS 5000
    <Location /fcgid-bin/>
        SetHandler fcgid-script
        Options +ExecCGI
    </Location>
</IfModule>
Edit :
- Uncomment the loading of the actions module:
LoadModule actions_module modules/mod_actions.so
- Load the FCGID module after the loading of the unixd module (on which it is dependent) — you may wish to place this within the block:
LoadModule fcgid_module modules/mod_fcgid.so
- Ensure that the inclusion of the MPM configuration is uncommented (it is uncommented in the default installed version of this file):
Include conf/extra/httpd-mpm.conf
- Add an inclusion of your new FCGID configuration:
Include conf/extra/php-fcgid.conf
Restart .
Using php-fpm and mod_proxy_fcgi
Note: Unlike the widespread setup with ProxyPass, the proxy configuration with SetHandler respects other Apache directives like DirectoryIndex. This ensures a better compatibility with software designed for libphp, mod_fastcgi and mod_fcgid.
If you still want to try ProxyPass, experiment with a line like this:
ProxyPassMatch ^/(.*\.php(/.*)?)$ unix:/run/php-fpm/php-fpm.sock|fcgi://localhost/srv/http/$1
Install .
Enable proxy modules:
/etc/httpd/conf/httpd.conf
LoadModule proxy_module modules/mod_proxy.so
LoadModule proxy_fcgi_module modules/mod_proxy_fcgi.so
Create with the following content:
DirectoryIndex index.php index.html
<FilesMatch \.php$>
    SetHandler "proxy:unix:/run/php-fpm/php-fpm.sock|fcgi://localhost/"
</FilesMatch>
And include it at the bottom of :
Include conf/extra/php-fpm.conf
You can configure PHP-FPM in , but the default setup should work fine.
Start and enable . Restart .
Test whether PHP works
To test whether PHP was correctly configured, create a file called in your Apache directory (e.g. or ) with the following contents:
<?php phpinfo(); ?>
HTTP/2
Note:
- If supporting clients do not use HTTP/2 instead of HTTP/1.1 and Mozilla’s config generator (which already includes the line below) was used to setup , try ing after the latter’s output.
To enable HTTP/2 over TLS support, uncomment the following line in :
LoadModule http2_module modules/mod_http2.so
And add the following line:
Protocols h2 http/1.1
To debug, you can set only the module rather than the entire server to or :
<IfModule http2_module>
    LogLevel http2:info
</IfModule>
Warning: The is incompatible with the that old configurations widely use to setup PHP. Consider using instead.
Архитектура сервера
Модульный сервер «Апач» состоит из основного раздела и различных модулей, предоставляющих большую часть базовых функций. Некоторые из этих модулей:
- mod_ssl — безопасная связь через TLS;
- mod_rewrite — перезапись адреса, обычно используется для преобразования динамических страниц, таких как php, в статические, чтобы обмануть поисковые системы относительно того, где они были разработаны;
- mod_dav — поддержка протокола WebDAV (RFC 2518) ;
- mod_deflate — алгоритм сжатия прозрачен, когда содержимое отправляется клиенту;
- mod_auth_ldap — позволяет пользователям проходить аутентификацию на сервере LDAP;
- mod_proxy_ajp — соединитель для связи с Jakarta Tomcat динамических страниц в Java (сервлеты и JSP).
Базовый сервер может быть расширен за счет включения внешних модулей, среди которых:
- mod_cband — управление трафиком и ограничение полосы пропускания;
- mod_perl — динамические в Perl;
- mod_php — динамические в PHP;
- mod_python — динамические в Python;
- mod_rexx — динамические в REXX и объект REXX;
- mod_ruby — динамические в Ruby;
- mod asp dot net — динамические в Microsoft.NET;
- mod_mono — динамические в моно;
- mod_security — фильтрация на уровне приложения для безопасности.
Using _default_ vhosts 
vhosts
for all ports
Catching every request to any unspecified IP address and
port, i.e., an address/port combination that is not used for
any other virtual host.
<VirtualHost _default_:*>
    DocumentRoot "/www/default"
</VirtualHost>
Using such a default vhost with a wildcard port effectively prevents
any request going to the main server.
A default vhost never serves a request that was sent to an
address/port that is used for name-based vhosts. If the request
contained an unknown or no header it is always
served from the primary name-based vhost (the vhost for that
address/port appearing first in the configuration file).
You can use or
to rewrite any
request to a single information page (or script).
vhosts
for different ports
Same as setup 1, but the server listens on several ports and we want
to use a second vhost for port 80.
<VirtualHost _default_:80>
    DocumentRoot "/www/default80"
    # ...
</VirtualHost>

<VirtualHost _default_:*>
    DocumentRoot "/www/default"
    # ...
</VirtualHost>
The default vhost for port 80 (which must appear before any
default vhost with a wildcard port) catches all requests that were sent
to an unspecified IP address. The main server is never used to serve a
request.
vhosts
for one port
We want to have a default vhost for port 80, but no other default
vhosts.
<VirtualHost _default_:80>
    DocumentRoot "/www/default"
...
</VirtualHost>
A request to an unspecified address on port 80 is served from the
default vhost. Any other request to an unspecified address and port is
served from the main server.
Upgrading
The first step in upgrading is to read the release announcement
and the file in the source distribution to
find any changes that may affect your site. When changing between
major releases (for example, from 2.0 to 2.2 or from 2.2 to 2.4),
there will likely be major differences in the compile-time and
run-time configuration that will require manual adjustments. All
modules will also need to be upgraded to accommodate changes in the
module API.
Upgrading from one minor version to the next (for example, from
2.2.55 to 2.2.57) is easier. The
process will not overwrite any of your existing documents, log
files, or configuration files. In addition, the developers make
every effort to avoid incompatible changes in the
options, run-time configuration, or the
module API between minor versions. In most cases you should be able to
use an identical command line, an identical
configuration file, and all of your modules should continue to
work.
To upgrade across minor versions, start by finding the file
in the directory of
your installed server or at the root of the source tree for your
old install. This will contain the exact
command line that you used to
configure the source tree. Then to upgrade from one version to
the next, you need only copy the file to
the source tree of the new version, edit it to make any desired
changes, and then run:
You should always test any new version in your
environment before putting it into production. For example, you
can install and run the new version along side the old one by
using a different and a
different port (by adjusting the directive) to test for any
incompatibilities before doing the final upgrade.
You can pass additional arguments to ,
which will be appended to your original
options:
11 October 2019 — Nutch 2.4 Release
The Apache Nutch PMC are pleased to announce the immediate release of Apache Nutch v2.4, we advise all
current users and developers of the 2.X series to upgrade to this release.
This release contains 81 issues addressed. For a complete overview of these
issues please see the release report.
As usual in the 2.X series, release artifacts are made available as only source and also available within
Maven Central as a Maven dependency.
The release is available from our downloads page.
We expect that v2.4 is the last release on the 2.X series. We’ve decided to freeze the development on the 2.X branch for now, as no committer is
actively working on it.
Clients, Servers, and URLs 
Addresses on the Web are expressed with URLs — Uniform Resource Locators
— which specify a protocol (e.g. ), a servername (e.g.
), a URL-path (e.g.
), and possibly a query
string (e.g. ) used to pass additional
arguments to the server.
A client (e.g., a web browser) connects to a server (e.g., your Apache HTTP Server),
with the specified protocol, and makes a request for a resource using the
URL-path.
The URL-path may represent any number of things on the server. It may
be a file (like ) a handler (like server-status) or some kind of program
file (like ). We’ll discuss this more below in
the section.
The server will send a response consisting of a status
code and, optionally, a response body.
The status code indicates whether the request was successful, and, if not, what
kind of error condition there was. This tells the client what it should
do with the response. You can read about the possible response codes in
HTTP Server
wiki.
Копирование числовых ячеек из 1С в Excel Промо
Решение проблемы, когда значения скопированных ячеек из табличных документов 1С в Excel воспринимаются последним как текст, т.е. без дополнительного форматирования значений невозможно применить арифметические операции. Поводом для публикации послужило понимание того, что целое предприятие с более сотней активных пользователей уже на протяжении года мучилось с такой, казалось бы на первый взгляд, тривиальной проблемой. Варианты решения, предложенные специалистами helpdesk, обслуживающими данное предприятие, а так же многочисленные обсуждения на форумах, только подтвердили убеждение в необходимости описания способа, который позволил мне качественно и быстро справиться с ситуацией.
Совместная работа Apache с Nginx
Apache – это не единственный популярный веб-сервер. Главным конкурентом является NginX, представленный в 2004 году в виде ПО для решения c10k-проблемы (существовавшая на тот момент сложность в обработке большого числа одновременно поступающих запросов).
Nginx – веб-сервер с событийно-ориентированной архитектурой, обрабатывающий каждый новый запрос в одном потоке. Он демонстрирует высокую производительность (значительно превосходит Apache) при работе со статическим контентом. Эта особенность обуславливает совместное использование двух видов ПО (связка NginX + Apache). Первый выполняет роль фильтра запросов, обрабатывая запросы на статический контент самостоятельно и перенаправляя запросы других типов на Apache.
Файл apache2.conf
Несомненно, apache2.conf является наиболее важным файлом, так как он определяет общее поведение веб-страниц и, кроме того, отвечает за доступ к различным модулям, которые расширяют функциональные возможности сервера.
Он находится в каталоге /etc /apache2, и, поскольку это текстовый файл, его можно легко редактировать с помощью текстового редактора. Свойства файла конфигурации — глобальные переменные сервера и расширение функциональности.
Глобальные переменные сервера — это переменные, которые определяют общее функционирование:
Таблица директив «Апач». Имя сервера обозначено переменной ServerName, поэтому любое перенаправление или ссылка, существующие в HTML-документах, работают хорошо. Большинство переменных конфигурации распределены среди других небольших файлов, хранящихся в mods-available.
.htaccess — это скрытый текстовый файл, который позволяет настроить работу сервера.
«Апач» — конкретный каталог без необходимости изменять основной файл конфигурации apache2.conf
Когда веб-клиент запрашивает файл с сервера, он смотрит из корневого каталога в подкаталог, содержащий запрошенный для .htaccess, и принимает во внимание содержащиеся в нем директивы перед выполнением запроса.
Принцип .htaccess:
- Запрещает перечисление файлов в каталоге.
- Перенаправляет веб-трафик.
- Настраивает страницы ошибок.
- Ограничивает доступ к определенным файлам.
- Запрещает доступ к определенным IP-адресам или диапазонам IP-адресов.
- Расширяет функциональность, что связано с вызовами других модулей и файлами конфигурации. Всем директивам, связанных с этим пунктом, будет предшествовать слово «Включить».
Configuration Files and Directives 
The Apache HTTP Server is configured via simple text files.
These files may be located any of a variety of places, depending on how
exactly you installed the server. Common locations for these files may
be found in
the httpd wiki. If you installed httpd from source, the default
location of the configuration files is
. The default configuration file is
usually called . This, too, can vary in
third-party distributions of the server.
The configuration is frequently broken into multiple smaller files,
for ease of management. These files are loaded via the directive. The names or locations of
these sub-files are not magical, and may vary greatly from one
installation to another. Arrange and subdivide these files as
makes the most sense to you. If the file arrangement
you have by default doesn’t make sense to you, feel free to rearrange it.
The server is configured by placing configuration directives in these
configuration files. A directive is a keyword followed by one or more
arguments that set its value.
The question of «Where should I put that
directive?» is generally answered by considering where you want a
directive to be effective. If it is a global setting, it should appear
in the configuration file, outside of any , , , or other section. If it is to
apply only to a particular directory, then it should go inside a
section referring to
that directory, and so on. See the Configuration
Sections document for further discussion of these sections.
Обогащение данных — что это и почему без него никак
Обогащение данных — это процесс дополнения сырых данных той информацией, которая в исходном виде в них отсутствует, но необходима для качественного анализа. Оно требуется, чтобы конечные потребители данных получали качественную информацию.В этой статье рассмотрим, что такое обогащение данных в контексте их автоматизированной обработки и какие технические средства мы для этого используем. Главный результат — если объединять данные, применяя предложенную нами схему обогащения, то в дальнейшем аналитикам не потребуется каждый раз делать JOIN-запрос, что сэкономит как ценное время людей, так и машинные ресурсы.
Serving the same content on different IP addresses (such as an internal and external address). 
The server machine has two IP addresses (
and ). The machine is sitting between an
internal (intranet) network and an external (internet) network. Outside
of the network, the name resolves to
the external address (), but inside the
network, that same name resolves to the internal address
().
The server can be made to respond to internal and external requests
with the same content, with just one section.
<VirtualHost 192.168.1.1 172.20.30.40>
    DocumentRoot "/www/server1"
    ServerName server.example.com
    ServerAlias server
</VirtualHost>
Now requests from both networks will be served from the same
.
Об устройстве кабины
Ударный вертолет «Апач» оборудован двухместной кабиной, для которой характерно тандемное расположение сидений. Переднее предназначено для второго летчика-стрелка, а заднее, приподнятое на 480 мм, – пилота. Нижняя часть и бока кабины покрыты броней. Пространство между сиденьями стало местом для прозрачной перегородки. При ее изготовлении используются кевлар и полиакрилат. Данная перегородка способна выдержать прямое попадание пули и снаряда, калибры которых варьируются в пределах от 12,7 до 23 мм. Благодаря такой конструкции кабины летному экипажу обеспечена максимальная защита.
Стремясь повысить боевую живучесть вертолета «Апач», американские конструкторы в «вертушке» используют две независимые гидросистемы, протектированные топливные баки и бронированные наиболее важные системы и участки.
Для конструкции российского вертолета Ка-52 (по классификации НАТО он значится как «Аллигатор») характерна соосная схема. Кабина в данной «вертушке» двухместная. Однако кресла расположены бок о бок друг к другу. Ограничений для пилотирования в «Аллигаторе» не имеется. Таким образом, вести огонь и управлять «вертушкой» могут оба пилота. Кабина вертолета комплектуется специальной бронированной капсулой. Катапультироваться экипаж может на высоте не менее 4100 м. Бронированное покрытие защищает летчиков от пуль калибра не выше 23 мм.
Hostnames and DNS 
In order to connect to a server, the client will first have to resolve
the servername to an IP address — the location on the Internet where the
server resides. Thus, in order for your web server to be reachable, it
is necessary that the servername be in DNS.
If you don’t know how to do this, you’ll need to contact your network
administrator, or Internet service provider, to perform this step for
you.
More than one hostname may point to the same IP address, and more
than one IP address can be attached to the same physical server. Thus, you
can run more than one web site on the same physical server, using a
feature called virtual hosts.
If you are testing a server that is not Internet-accessible, you
can put host names in your hosts file in order to do local resolution.
For example, you might want to put a record in your hosts file to map a
request for to your local system, for
testing purposes. This entry would look like:
A hosts file will probably be located at or
.
Apache Ozone: следующее поколение хранилища для платформы больших данных
Перевод
Apache Ozone: следующее поколение хранилища для платформы больших данных
Распределенная файловая система Apache Hadoop (HDFS) де-факто является файловой системой для больших данных. Верная своим корням big data, HDFS работает лучше всего, когда большинство файлов имеют большой размер — от десятков до сотен мегабайт. Ozone — это распределенное хранилище, которое может управлять как малыми, так и большими файлами. Ozone разрабатывается и внедряется командой инженеров и архитекторов, имеющих значительный опыт управления большими кластерами Apache Hadoop. Это дало нам представление о том, что HDFS делает хорошо, и о некоторых вещах, которые можно делать по-другому.
Сравнение Apache с другими веб-серверами
Есть и другие веб-серверы, обладающие своими преимуществами и недостатками. Обо всех них в рамках этой статьи говорить не будем, рассмотрим лишь пару достойных конкурентов.
Начнем с самого известного решения – Nginx. Здесь сказать можно только одно – его главным преимуществом является преодоление барьера в 10 000 одновременных соединений. Apache не может обработать такой большой поток трафика сразу, поэтому многие вебмастера и переключились на альтернативу, когда масштабы их проекта значительно увеличились. Связано это с поточной структурой Apache и невозможностью реализовать прохождение такого барьера. Однако в некотором плане Апач превосходит Nginx, если говорить о простоте настройки, подключении модулей и юзерфрендли-подходе от разработчиков.
Второй конкурент – Tomcat, его разработала та же компания, что и Apache, но уже для других целей. Он используется для работы приложений, написанных на Java, а Apache-сервер – это HTTP-направленный инструмент. Если вы не используете Java, а управляете статическими веб-страницами, переключаться на Tomcat точно не стоит.
Log Files and Troubleshooting 
As an Apache HTTP Server administrator, your most valuable assets are
the log files, and, in particular, the error log. Troubleshooting any
problem without the error log is like driving with your eyes closed.
The location of the error log is defined by the directive, which may be set globally,
or per virtual host. Entries in the error log tell you what went wrong,
and when. They often also tell you how to fix it. Each error log message
contains an error code, which you can search for online for even more
detailed descriptions of how to address the problem. You can also
configure your error log to contain a log ID which you can then
correlate to an access log entry, so that you can determine what request
caused the error condition.