Www.makeuseof.com
Содержание:
- Why should you use VirtualBox Guest Additions?
- Troubleshooting
- Enable Shared Folder
- Conclusion
- Non-Issues[edit]
- Footnotesedit
- Extras (missing Guest Additions)
- Guest OS Installation
- Support Guest Operating Systems
- VirtualBox Guest Additions Security[edit]
- Alternativesedit
- What Do the Guest Additions Do?
- Установите гостевые дополнения VirtualBox в Ubuntu / Debian Linux
- What Is VirtualBox?
- Поддерживаемые операционный системы:
- Uninstall virtualbox-guest-additions-iso[edit]
- Installing VirtualBox Guest Additions on Ubuntu
- Гостевые дополнения VirtualBox
- Страница загрузки пакета virtualbox-guest-additions-iso_6.1.20-1_all.deb
Why should you use VirtualBox Guest Additions?
With VirtualBox Guest Additions enabled, using the virtual machine becomes a lot more comfortable. Don’t believe me? Here are the important features that the Guest Additions offer:
- Mouse pointer integration: You no longer need to press any key to “free” the cursor from the Guest OS.
- Shared clipboard: With the Guest Additions installed, you can copy-paste between the guest and the host operating systems.
- Drag and drop: You can also drag and drop files between the host and the guest OS.
- Shared folders: My favorite feature; this feature allows you to exchange files between the host and the guest. You can tell VirtualBox to treat a certain host directory as a shared folder, and the program will make it available to the guest operating system as a network share, irrespective of whether guest actually has a network.
- Better video support: The custom video drivers that are installed with the Guest Additions provide you with extra high and non-standard video modes, as well as accelerated video performance. It also allows you to resize the virtual machine’s window. The video resolution in the guest will be automatically adjusted, as if you had manually entered an arbitrary resolution in the guest’s Display settings.
- Seamless windows: The individual windows that are displayed on the desktop of the virtual machine can be mapped on the host’s desktop, as if the underlying application was actually running on the host.
- Generic host/guest communication channels: The Guest Additions enable you to control and monitor guest execution. The “guest properties” provide a generic string-based mechanism to exchange data bits between a guest and a host, some of which have special meanings for controlling and monitoring the guest. Applications can be started in the Guest machine from the Host.
- Time synchronization: The Guest Additions will resynchronize the time with that of the Host machine regularly. The parameters of the time synchronization mechanism can be configured.
- Automated logins: Basically credentials passing, it can be a useful feature.
Impressed by the features it provides? Let’s see how you can install VirtualBox Guest Additions on Ubuntu Linux.
Troubleshooting
EFI case
latest releases of virtualbox have a volatile NVRAM and this makes an EFI guest boot troublesome. To workaround this following steps required:
- remove any CD images (like systemrescuecd) from the VM settings
- start the VM
- wait for the countdown or press Esc immediately to reach the EFI shell
- type to open the full-screen editor
- enter (including the double quotes, since the path contains spaces)
- press (maybe twice) to save and confirm saving by pressing Enter
- quit editor by pressing
- type to reboot the machine (or kill the VM and boot it using the GUI)
- wait for the countdown or press Enter to immediately run the startup.nsh script
EFI guests now should properly boot.
reference reports: https://www.virtualbox.org/ticket/14279 and https://bugs.funtoo.org/browse/FL-2640
An alternative workaround is to rename the grub EFI binary to take advantage of the EFI default boot behavior. During installation, when installing a boot-loader, do these additional steps:
- Create a folder under called
- Copy to
Now you can also share files between host and guest OS via the shared folder feature. Go to the virtual machine settings. In the left pane, select . Then click on the button to add a shared folder.
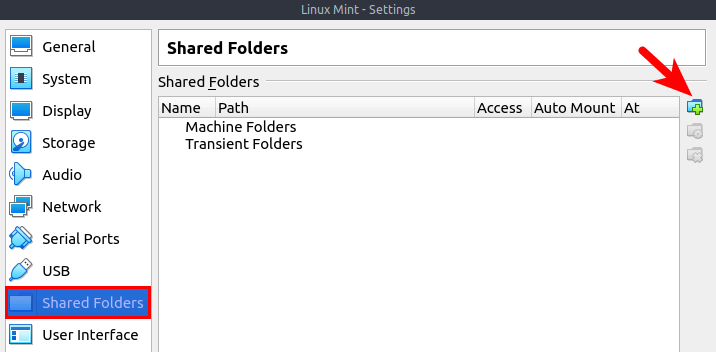
- In the field, select a folder on your host OS.
- Tick on the checkbox so that the shared folder will be automatically mounted to the guest OS when virtual machine boots up.
- In the Mount-point field, enter a path on the guest OS, such as a sub-directory in your user’s home directory.
- Tick on the checkbox.
After saving the settings, you will find the shared folder appears in your home directory in the Linux Mint virtual machine, but only the root user and members of the vboxsf group have read and write access to this shared folder. So what we need to now is add your user to vboxsf group. Open up a terminal in Linux Mint and run the following command. Replace username with your real username.
sudo adduser username vboxsf
Log out of the current session and log back in. Now you should be able to access the shared folder.
Conclusion
The installation of VirtualBox Guest Additions is even simpler than VMware Tools. Then again, so is the
installation of VirtualBox. Either way, the procedure is simple and fast and rather painless. Minimal tinkering
with the command line is involved. Now, you have also learned how to master VirtualBox so that you can benefit
most from your guest machines.
Hopefully, this article, as well as the VMware Tools guide, help clear some of the mist. This way, we can move
on to more complicated things. Hint: in the next articles, we’ll talk optimization, bridged networking … and
even 3D acceleration? Stay tuned.
P.S. If you find this article useful, please support Dedoimedo.
Cheers.
Non-Issues[edit]
If the following message appears during a kernel upgrade, it is a non-issue.
/etc/kernel/postinst.d/vboxadd:
VirtualBox Guest Additions: Building the modules for kernel 5.6.0-0.bpo.2-amd64.
Failed to rename process, ignoring: Operation not permitted
update-initramfs terminated by signal TERM.
Footnotesedit
- Host -> Whonix-Gateway clipboard sharing enable by default?
-
https://forums.whonix.org/t/security-risks-of-virtualbox-shared-folders/10119
-
To learn more about VirtualBox shared folders, see: .
-
Admittedly, this recommendation does not have a strong rationale. Disabling additional features in other virtualizers or general applications will similarly lead to less code paths being utilized and arguably increasing security. VirtualBox software is not special in this regard.
- Because otherwise you cannot change VirtualBox VM settings.
- Using /lib/systemd/system/mnt-shared-vbox.service .
-
If the option is unavailable, upgrade VirtualBox.
-
Alternatively folder can be chosen. The VirtualBox default means that folder would be owned by owner and group .
-
This is specific to the VirtualBox version; newer versions do not have this option anymore.
Check if this setting should persist after restart of the virtual machine. Otherwise this setting will be temporary. -
This step is required. Quote :
-
Installation of VirtualBox guest additions from CD might also cause issues.
- http://www.webcitation.org/6HqJVN0br
- https://www.whonix.org/w/index.php?title=Ga&action=edit
Whonix is Supported by Evolution Host DDoS
Protected VPS. Stay private and get your VPS with Bitcoin or Monero.
Search engines: YaCy | Qwant | ecosia | MetaGer | peekier | Whonix Wiki
Follow:
Support:
Donate:
Please contribute by helping to .
This is a wiki. Want to improve this page? Help is welcome and volunteer contributions are happily considered! Read, understand and agree to , then Edit! Edits are held for moderation. Policy of Whonix Website and Whonix Chat and Policy On Nonfreedom Software applies.
Copyright (C) 2012 — 2021 ENCRYPTED SUPPORT LP. Whonix is a trademark. Whonix is a licensee of the Open Invention Network . Unless otherwise noted, the content of this page is copyrighted and licensed under the same Freedom Software as Whonix itself. (Why?)
The personal opinions of moderators or contributors to the Whonix project do not represent the project as a whole.
Whonix is a derivative of and not affiliated with Debian . Debian is a registered trademark owned by Software in the Public Interest, Inc .
Whonix is produced independently from the Tor anonymity software and carries no guarantee from The Tor Project about quality, suitability or anything else.
By using our website, you acknowledge that you have read, understood and agreed to our Privacy Policy, Cookie Policy, Terms of Service, and E-Sign Consent. Whonix is provided by ENCRYPTED SUPPORT LP. See Imprint, Contact.
Extras (missing Guest Additions)
This extra section is necessary, because sometimes people have trouble finding the Guest Additions! In general,
whenever you click Install Guest Additions …, VirtualBox is supposed to mount
the Guest Additions ISO. But this may not happen. There are several ways to rectify the situation:
First, if the Guest Additions are not found, VirtualBox may prompt you to access Internet and download the ISO
file. You only have to do this once. Unfortunately, I do not have a screenshots to share on this one.
Alternatively, you can download the image yourself and then manually mount it as a CD-ROM, under the
Settings for the particular virtual machine.
Then, the next time you launch the virtual machine, the Guest Additions will be mounted as a CD-ROM. To install
the Additions, on Windows, double-click the executable; on Linux, run the scripts as demonstrated above.

From here, you’re on common grounds.
Guest OS Installation
Install Guest Additions
VirtualBox Guest Additions is a collection of applications, libraries and kernel modules/drivers that are installed in your Guest OS. These provide support for graphics, networking, and other features such as file transfer and Guest access to real physical devices such as a USB flash drive.
Funtoo or Gentoo Linux Guests
Following the successful installation of you Funtoo Linux Guest OS (that is within a Virtual Machine), install the package .
root # emerge --ask app-emulation/virtualbox-guest-additions
Next, add your Guest OS Users to the group . For example, a user bob is added to
root # gpasswd -a bob vboxguest
Now add virtual-box-guest additions to the default runlevel of OpenRC.
root # rc-update add virtualbox-guest-additions default
Without having to reboot you can now start virtualbox-guest-additions within the Funtoo Guest OS with the command
root # rc
Microsoft Windows Guests
VirtualBox Guest Additions are installed in a Windows Guest by mounting a virtual CD-ROM image (.iso) within the guest virtual machine.
In your Host OS Funtoo Linux, confirm the version of VirtualBox installed:
For
user $ emerge --pretend --quiet app-emulation/virtualbox
 app-emulation/virtualbox-5.0.20
For VirtualBox versions 4.x (less than 5.0)
Under the earlier chapter , install (or ) with the USE flag enabled. This will provide the ISO necessary for installing Guest Additions within a Microsoft Windows guest.
For VirtualBox versions 5.0 and above
From version 5.0 the USE flag has been removed from the package app-emulation/virtualbox. The Guest Additions ISO required for a Windows-based Guest OS is now provided in a separate package, . Install this manually
root # emerge --ask app-emulation/virtualbox-additions
Warning
The package app-emulation/virtualbox-additions installs the Guest Additions ISO on your Host OS (Funtoo Linux). This is what you mount in a VM with Windows as a Guest OS. The package app-emulation/virtualbox-guest-additions is different. This is the Guest Additions that you install inside of a VM that happens to be a Guest OS of Funtoo Linux or Gentoo Linux.
The two packages perform different tasks so be sure to install the correct package!
Mount the Guest Additions ISO inside of your Microsoft Windows guest. Within Windows, browse to and install VirtualBox Guest Additions.
Support Guest Operating Systems
The VirtualBox Guest Additions are currently supported on the following guest operating systems:
Windows Vista
Windows XP
Windows Server 2003
Windows 2000
Windows NT 4.0
Fedora Core 4, 5, 6, 7, 8
Red Hat Enterprise Linux 3, 4, 5
SUSE Linux 9, 10.1, 10.2, 10.3
openSUSE 9, 10.1, 10.2, 10.3
Ubuntu 5.10, 6.06, 7.04, 7.10, 8.04, 8.10
Note that the list of supported guests is constantly evolving such that an operating system not listed above may still be able to run the VirtualBox Guest Additions. As a general rule, it won’t do any harm to try the guest additions even if the guest is not listed as being supported.
VirtualBox Guest Additions Security[edit]
General concerns have been raised about the security of VirtualBox, for example see the article The VirtualBox Kernel Driver Is Tainted Crap . However, this refers to the kernel driver (on the host), not guest additions. For opposite viewpoints, see here and here .
Alternativesedit
It is possible to achieve similar functionality without installing guest additions:
- For file exchange with Whonix , see: File Transfer and File Sharing.
- To achieve a higher screen resolution, see: Higher Screen Resolution without VirtualBox Guest Additions.
- To achieve mouse integration, it is possible to set a USB tablet in VirtualBox settings. This is recommended against because it requires adding a USB controller to VirtualBox. ( → → → → )
What Do the Guest Additions Do?
Now that we know what Guest Additions are, let’s look at what the VirtualBox Guest Additions actually do for you.
Chances are that you’ll eventually want to move some content between your virtual machine (the guest) and your actual computer (the host). With the Guest Additions installed, VirtualBox packs a few features to make this easy.
First is the shared clipboard/drag and drop support. This allows you to copy items on one platform and paste them on the other, as well as dragging files between them. To adjust this, select your VM on the VirtualBox home page and choose Settings.
In the General section, switch to Advanced tab and you can choose options for Shared Clipboard and Drag’n’Drop. You can choose Disabled, Host to Guest, Guest to Host, or Bidirectional for both of them.
Unless you have a specific reason to choose something else, Bidirectional is the most convenient.
Once you have this enabled, both copy/paste and dragging will work across systems.
If you’d rather make folders on your host system accessible in the VM, you can utilize shared folders. This Guest Additions feature lets you mount host folders as «network resources» in the guest OS without actually using a network.
To use it, click Settings on a VM and jump to the Shared Folders section. Select the Add Share button on the right side, then choose a folder on your computer to share with the guest.
Give it a name, choose Auto-mount if you want it to connect automatically, and hit OK.
Now, that folder will appear as a network drive in the guest OS.
3. Improved Graphics Support
As mentioned earlier, virtual machines don’t support high-resolution graphics from the start. Once you install the Guest Additions, though, you’ll have full control over the resolution options in the guest OS’s settings menu. For instance, if you have a 1920×1080 monitor, you can display the VM in full-screen at 1080p.
That’s not the only graphical enhancement that the Guest Additions add. Using them, the guest OS’s resolution will dynamically resize as you adjust the VirtualBox window on your computer. This lets you use the VM at any size you like without playing with resolution options.
Finally, with Guest Additions, the guest OS can take advantage of your computer’s graphics hardware. If you’re playing games or using other graphically intensive software in a WM, this makes a huge difference.
4. Seamless App Windows
Another neat benefit of the Guest Additions is a seamless mode. This lets you run app windows from the guest alongside apps from your host OS, so it feels like they’re all part of one system. It’s a lot like how Parallels runs Windows apps on a Mac.
To use this mode, press the Host key + L when your virtual machine is in focus. If you haven’t changed it, the default Host key in VirtualBox is the right Ctrl key.
Once you’ve done this, the VM will go full-screen and VirtualBox will remove its background. You’re then free to use its windows with your regular desktop software. Hit Host + L again to turn this off—if it doesn’t seem to work, make sure you select the VirtualBox VM first.
5. Other Benefits of VirtualBox Guest Additions
The above functions are the main features of VirtualBox’s Guest Additions. There are a few other useful perks to installing them, though these are not as generally useful.
One that may affect you, depending on the guest OS, is seamless mouse integration. With most modern OSes, VirtualBox allows you to seamlessly move your mouse between your host and guest system. However, some older OSes require exclusive control of your keyboard and mouse.
If this is the case, your mouse pointer will become «trapped» inside the VirtualBox window after you click inside it. This means that you must hit the Host key (right Ctrl by default) to bring the mouse control back to the host OS.
Otherwise, the Guest Additions bring time synchronization with your host machine, the option for automated logins, and can monitor communications between the guest and host. None of this has much use for the average user.
Установите гостевые дополнения VirtualBox в Ubuntu / Debian Linux
Следует иметь в виду, что гостевые дополнения, как следует из названия, являются дополнениями гостевой ОС, а не хост-ОС. Следовательно, в этом случае гостевой ОС, работающей на виртуальной машине, является Ubuntu, производные Ubuntu (включая сервер Ubuntu), производные Debian или Debian (включая сервер Debian). Операционная система, на которой установлен VirtualBox, может быть любой.
Способ установки VirtualBox Guest Additions незначительно зависит от дистрибутива. В некоторых случаях, как только вы монтируете образ компакт-диска VBox Guest Additions ISO, вам будет предложено выполнить скрипт автозапуска. На других вы должны будете вручную настроить VirtualBox Guest Additions. Ручной метод установки гостевых дополнений VirtualBox в Debian и Ubuntu Linux показан здесь, так как он должен работать в большинстве случаев.
Сначала нам нужно установить пакет с именем . Это необходимо, чтобы Virtual Box продолжала работать с любыми обновленными ядрами в будущем. Возможно, вы уже установили его, но при попытке повторить попытку и запустить команду, приведенную ниже, нет никаких проблем
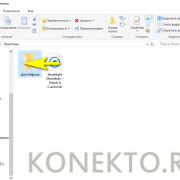
Далее вам не нужно скачивать компакт-диск VirtualBox Guest Additions. Все, что вам нужно сделать, это, когда запущено виртуальное устройство Ubuntu или Debian, перейти к ->, как показано на рисунке ниже. Это установит диск VBox Guest Additions для установки.
Загрузить образ компакт-диска VBox Guest Additions
В некоторых дистрибутивах Linux скрипт автозапуска открывается автоматически. В других случаях образ компакт-диска открывается и содержимое отображается в проводнике. Это то, что случилось с Xubuntu, который используется в этой демонстрации.
Открыть VBox Guest Additions CD
Теперь вы можете щелкнуть правой кнопкой мыши в пустом месте в проводнике и выбрать «Открыть терминал здесь». В некоторых других ничего не происходит после того, как вы вставите образ компакт-диска, и вам придется вручную открыть терминал и перемещаться по содержимому. Образ компакт-диска, как правило, монтируется под , где указано ваше имя пользователя и имя образа компакт-диска. В этой демонстрации путь:
Как только у вас откроется окно терминала и вы окажетесь в папке образа компакт-диска, вы готовы установить гостевые дополнения VirtualBox на гостевую ОС Ubuntu или Debian. Наконец, запустите установщик гостевых дополнений VBox, используя следующую команду:
Вот и все, просто сидеть и смотреть. Сценарий автоматически подготовит и установит гостевые дополнения VBox в Ubuntu / Debian.
Установите гостевые дополнения VirtualBox в Ubuntu / Debian
После завершения установки перезагрузите гостевую ОС, и все готово. Теперь вы сможете запускать гостевую ОС в полноэкранном режиме, перетаскивать объекты между гостевой и хост-ОС, делиться буфером обмена и делать многое другое. На мой взгляд, если вы используете VirtualBox, то гостевые дополнения обязательно. VirtualBox также предлагает так называемый , который добавляет некоторые расширенные функции. Но большинству пользователей не нужен пакет расширений. Установите гостевые дополнения VirtualBox на гостевые ОС Ubuntu и Debian и наслаждайтесь повышенной производительностью и возможностями.
Источник записи: https://www.smarthomebeginner.com
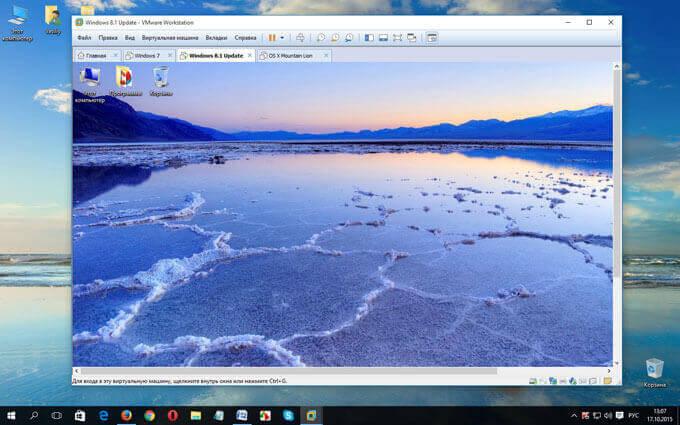
What Is VirtualBox?
Often referred to as the best virtual machine, VirtualBox is a powerful AMD64/Intel64 and x86 virtualization creation for both home and enterprise use. For the time being, VirtualBox is the only professional solution available freely as Open Source Software, which is one of the top reasons why its popularity has skyrocketed and thus several releases of it have taken place.
VirtualBox has been established with great community effort and is back by a company that is very dedicated to providing a first-class service in every aspect. It is downloaded in record numbers every day. It is currently the top Windows 10 virtual machine, and it does not seem this is going to change anytime soon.
Virtualbox Guest Additions
The VirtualBox Guest Additions consist of device drivers and system applications that optimize the operating system for better performance and usability. One of the usability features required in this guide is automated logons, which is why you need to install the Guest Additions in the virtual machine. For a Windows 7 desktop template, you also enable Windows media redirection for enhanced playback of multimedia content played in Windows Media Player (including content displayed in Internet Explorer).
To accessing this option In the Window containing the running virtual machine, select Install Guest Additions from the Devices menu. And the AutoPlay to run this guest additions will prompt.
Поддерживаемые операционный системы:
Windows:
- Windows XP SP3 (32-bit и 64-bit)
- Windows Vista SP1 и выше (32-bit и 64-bit).
- Windows Server 2008 (64-bit)
- Windows Server 2008 R2 (64-bit)
- Windows 7 (32-bit и 64-bit)
- Windows 8 (32-bit и 64-bit)
- Windows 8.1 (32-bit и 64-bit)
- Windows 10 RTM build 10240 (32-bit и 64-bit)
- Windows 10 RTM build 10586 (32-bit и 64-bit)
- Windows Server 2012 (64-bit)
- Windows Server 2012 R2 (64-bit)
Mac OS X (64-bit):
- 10.8 (Mountain Lion)
- 10.9 (Mavericks)
- 10.10 (Yosemite)
- 10.11 (El Capitan)
Linux (32-bit и 64-bit):
- Ubuntu 10.04 до 15.04
- Debian GNU/Linux 6.0 («Squeeze») и 8.0 («Jessie»)
- Oracle Enterprise Linux 5, Oracle Linux 6 и 7
- Redhat Enterprise Linux 5, 6 и 7
- Fedora Core / Fedora 6 до 22
- Gentoo Linux
- openSUSE 11.4, 12.1, 12.2, 13.1
- Mandriva 2011
Solaris hosts (64-bit):
- Solaris 11
- Solaris 10 (U10 и выше
Uninstall virtualbox-guest-additions-iso[edit]
This is discouraged and should not be required. However, if you wish to uninstall VirtualBox guest additions as installed by by Whonix developers, follow the steps below.
-
Purge package . This will result in by Whonix developers in future doing effectively nothing.
sudo apt purge virtualbox-guest-additions-iso
sudo apt purge virtualbox-guest-additions-iso
-
Remove VirtualBox guest additions (previously installed by Whonix from . Run VirtualBox guest additions uninstaller by VirtualBox developers.
sudo /usr/sbin/vbox-uninstall-guest-additions
sudo /usr/sbin/vbox-uninstall-guest-additions
Installing VirtualBox Guest Additions on Ubuntu
The scenario here is that you have Ubuntu Linux installed inside VirtualBox. The host system could be any operating system.
I’ll demonstrate the installation process on a minimal install of a Ubuntu virtual machine. First run your virtual machine:
VirtualBox Ubuntu Virtual Machine
To get started, select Device > Insert Guest Additions CD image…:
Insert Guest Additions CD Image
This will provide you with the required installer inside the guest system (i.e. the virtual operating system). It will try auto-running, so just click Run:
AutoRun Guest Additions Installation
This should open up the installation in a terminal window. Follow the on-screen instructions and you’ll have the Guest Additions installed in a few minutes at most.
Troubleshooting tips:
If you get an error like this one, it means you are missing some kernel modules (happens in some cases, such as minimal installs):
Error while installing Guest Additions in Ubuntu
You need to install a few more packages here. Just to clarify, you need to run these commands in the virtual Ubuntu system:
Now run the Guest Addition setup again:
Гостевые дополнения VirtualBox
Для улучшения работы с виртуальной машиной, и взаимодействия с ней, в виртуально установленной операционной системе нужно установить специальный набор инструментов, который называется «Гостевые дополнения» («Guest Additions»). Данный набор инструментов выпускается для следующих операционных систем:
- Windows (начиная с Windows NT 4.0, и заканчивая Windows 10);
- Linux (официально поддерживаются Oracle Linux, Fedora, Red Hat Enterprise Linux, SUSE (в том числе openSUSE), Ubuntu);
- Oracle Solaris;
- OS/2.
Для установки гостевых дополнений VirtualBox необходимо выполнить следующие действия:
- Включаем виртуальную машину и ждем загрузки ОС.
- В верхнем меню VirtualBox выбираем пункт «Устройства — Подключить образ диска Дополнений гостевой ОС…».
Дальнейшие действия зависят от того, какая операционная система установлена в VirtualBox:
Windows
- Если в системе не отключен автозапуск, то должен запуститься установщик дополнений гостевой ОС. Если же в системе выключен автозапуск, нужно запустить установщик вручную, найдя его на подключившемся диске в виртуальной машине, под именем VBoxWindowsAdditions.exe.
- Как и установка самого VirtualBox, установка гостевых дополнений максимально упрощена, и по сути представляет из себя нажатие кнопок «Next». С первым окном именно так и следует поступить.
- На следующем будет предложено выбрать место для установки гостевых дополнений. По умолчанию, рассматривается обычная для всех программ директория Program Files.
- Последним шагом, перед непосредственно самой установкой, будет выбор устанавливаемых компонентов:
- VirtualBox Guest Additions — собственно, сами гостевые дополнения VirtualBox;
- Start menu entries — ярлыки в меню «Пуск».
- Direct3D Support — третий компонент, который не выбран по умолчанию, является экспериментальной функцией по включению полноценного 3D ускорения в виртуальной машине. Для «простой» работы он не нужен.
- После нажатия на кнопку «Next» начнется установка гостевых дополнений, во время которой может появится окно с запросом на разрешения установки программного обеспечения для устройства (драйвер), которую необходимо одобрить.
- После установки дополнений потребуется перезагрузка компьютера, которую можно выполнить сразу (оставив отмеченным пункт «Reboot now»), или выполнив её позже самостоятельно (для этого нужно отметить пункт «I want to manually reboot later»).
- После перезагрузки произойдет множество полезных изменений — появится поддержка двухстороннего буфера обмена (о том, как его включить можно прочитать здесь), функция drag-n-drop между основной операционной системой и операционной системой в виртуальной машине, автоматический выбор разрешения экрана на основе размера окна VirtualBox и т. д.
Linux
В операционных системах семейства Linux, графический установщик гостевых дополнений отсутствует, вся установка происходит через терминал. Современные дистрибутивы прекрасно сами распознают файл автозапуска на образе с гостевыми дополнениями, и предлагают его запустить автоматически.
Можно так же запустить файл установки гостевых дополнений вручную. Для этого, нужно открыть терминал, и перейти в каталог, куда смонтирован виртуальный образ с файлами установки дополнений. Там же, нужно выполнить команду запуска файла установки:
После выполнения данной команды, начнется установка гостевых дополнений Linux, по завершению которой, понадобится перезагрузка системы.
Страница загрузки пакета virtualbox-guest-additions-iso_6.1.20-1_all.deb
Если вы работаете в Debian, для загрузки и установки пакетов настоятельно советуем использовать менеджер пакетов, например aptitude или synaptic, а не делать это вручную через данный сайт.
Используйте любой из серверов-зеркал, добавив его в свой файл /etc/apt/sources.list, например так:
deb http://ftp.de.debian.org/debian sid main non-free
Заменив ftp.de.debian.org/debian нужным сервером.
Вы можете скачать требуемый файл из подкаталога pool/non-free/v/virtualbox-guest-additions-iso/ с любого из этих сайтов:
Северная Америка
- ftp.us.debian.org/debian
- http.us.debian.org/debian
- ftp.debian.org/debian
- ftp.ca.debian.org/debian
- ftp.mx.debian.org/debian
Южная Америка
- ftp.br.debian.org/debian
- ftp.cl.debian.org/debian
- download.unesp.br/linux/debian
- sft.if.usp.br/debian
- debian.torredehanoi.org/debian
Азия
- ftp.cn.debian.org/debian
- ftp.jp.debian.org/debian
- ftp.kr.debian.org/debian
- ftp.hk.debian.org/debian
- ftp.tw.debian.org/debian
Африка
debian.mirror.ac.za/debian
Европа
- ftp.de.debian.org/debian
- ftp.at.debian.org/debian
- ftp.bg.debian.org/debian
- ftp.ch.debian.org/debian
- ftp.cz.debian.org/debian
- ftp.dk.debian.org/debian
- ftp.ee.debian.org/debian
- ftp.es.debian.org/debian
- ftp.fi.debian.org/debian
- ftp.fr.debian.org/debian
- ftp.hr.debian.org/debian
- ftp.hu.debian.org/debian
- ftp.ie.debian.org/debian
- ftp.is.debian.org/debian
- ftp.it.debian.org/debian
- ftp.lt.debian.org/debian
- ftp.nl.debian.org/debian
- ftp.no.debian.org/debian
- ftp.pl.debian.org/debian
- ftp.ro.debian.org/debian
- ftp.ru.debian.org/debian
- ftp.se.debian.org/debian
- ftp.si.debian.org/debian
- ftp.tr.debian.org/debian
- ftp.uk.debian.org/debian
Океания
- ftp.au.debian.org/debian
- ftp.wa.au.debian.org/debian
- ftp.nz.debian.org/debian
Если загрузка с этих сайтов происходит медленно, попробуйте другие из полного списка серверов-зеркал.
Заметим, что при работе с некоторыми браузерами вам придётся указать браузеру, что вы хотите сохранить информацию в файл. Например, в Firefox или Mozilla вам нужно удерживать клавишу Shift при щелчке по URL.
Подробней о virtualbox-guest-additions-iso_6.1.20-1_all.deb:
| Точный размер | 44782136 байт (42,7 MByte) |
|---|---|
| Контрольная сумма MD5 | 5b7632f5675057f3cfff9e972f68360b |
| Контрольная сумма SHA1 | Недоступно |
| Контрольная сумма SHA256 | 665df1885bb86791cd9aa6a016e401d1e2f449d35a321e2057a4d0c0ec77d6f9 |