Microsoft visual studio
Содержание:
- Visual Studio 2017 версии 15.6 или более позднейUpdate Visual Studio 2017 version 15.6 or later
- Step 4 — Choose workloads
- Шаг 5. Выбор отдельных компонентов (необязательно)Step 5 — Choose individual components (Optional)
- Step 1 — Make sure your computer is ready for Visual Studio
- Скачивание загрузчика Visual StudioDownload the Visual Studio bootstrapper
- ДиагностикаDiagnostics
- Следующие шагиNext steps
- Шаг 3. Установка установщика Visual StudioStep 3 — Install the Visual Studio installer
- Публикация в Интернете или развертывание в сетевой папкеPublish to the web or deploy to a network share
- Функции нацеливания на платформуFramework targeting features
- Техническая поддержкаGet support
- List of Utilities for Visual Studio 2019
- Как эффективнее работать с C#
- Показывать дополнительные конфигурации построенияShow advanced build configurations
Visual Studio 2017 версии 15.6 или более позднейUpdate Visual Studio 2017 version 15.6 or later
Мы ускорили процесс установки и обновления, чтобы его можно выполнять непосредственно в интегрированной среде разработки.We’ve streamlined the installation and update experience to make it easier to use directly from within the IDE. Вот как можно обновить версию 15.6 и более поздние версии до последней версии Visual Studio.Here’s how to update from version 15.6 and later to newer versions of Visual Studio.
Использование Центра уведомленийUsing the Notifications hub
При наличии обновлений в Visual Studio отображается соответствующий флаг уведомления.When there’s an update, there’s a corresponding notification flag in Visual Studio.
-
Сохраните результаты своих действий.Save your work.
-
Выберите флаг уведомления, чтобы открыть центр уведомлений, а затем выберите уведомление, которое вы хотите установить.Choose the notification flag to open the Notifications hub, and then choose the update that you want to install.
Совет
Обновление для выпуска Visual Studio 2017 является накопительным, поэтому всегда выбирайте для установки то, у которого новейший номер версии.An update for an edition of Visual Studio 2017 is cumulative, so always choose to install the one with the most recent version number.
-
Когда откроется диалоговое окно Обновление, выберите Обновить сейчас.When the Update dialog box opens, choose Update Now.
Если откроется диалоговое окно управления доступом пользователя, выберите Да.If a User Access Control dialog box opens, choose Yes. Затем на некоторое время может открыться диалоговое окно с сообщением «Пожалуйста, подождите». Затем откроется Visual Studio Installer, чтобы начать обновление.Next, a «Please wait» dialog might open for a moment, and then the Visual Studio Installer opens to start the update.
Обновление продолжается.Your update continues. Когда обновление завершится, Visual Studio перезапустится.Then, when it’s complete, Visual Studio restarts.
Примечание
Если вы запускаете Visual Studio с правами администратора, вручную перезапустите его после обновления.When you run Visual Studio in administrator mode, you must manually restart Visual Studio after the update.
Использование интегрированной среды разработкиUsing the IDE
Можно проверить наличие обновлений и установить из в строке меню Visual Studio.You can check for an update and then install the update from the menu bar in Visual Studio.
-
Сохраните результаты своих действий.Save your work.
-
Выберите Справка > Проверка обновлений.Choose Help > Check for Updates.
-
Когда откроется диалоговое окно Обновление, выберите Обновить сейчас.When the Update dialog box opens, choose Update Now.
Как описано в предыдущем разделе, Visual Studio перезагружается после успешного завершения обновления.The update proceeds as described in the previous section, and then Visual Studio restarts after the update completes successfully.
Примечание
Если вы запускаете Visual Studio с правами администратора, вручную перезапустите его после обновления.When you run Visual Studio in administrator mode, you must manually restart Visual Studio after the update.
Использование Visual Studio InstallerUsing the Visual Studio Installer
Как и в предыдущих версиях Visual Studio, для установки обновлений можно использовать Visual Studio Installer.As in earlier versions of Visual Studio, you can use the Visual Studio Installer to install an update.
-
Сохраните результаты своих действий.Save your work.
-
Запустите установщик.Open the installer. Прежде чем продолжить, может потребоваться обновить Visual Studio Installer.The Visual Studio Installer might require updating before you continue.
Примечание
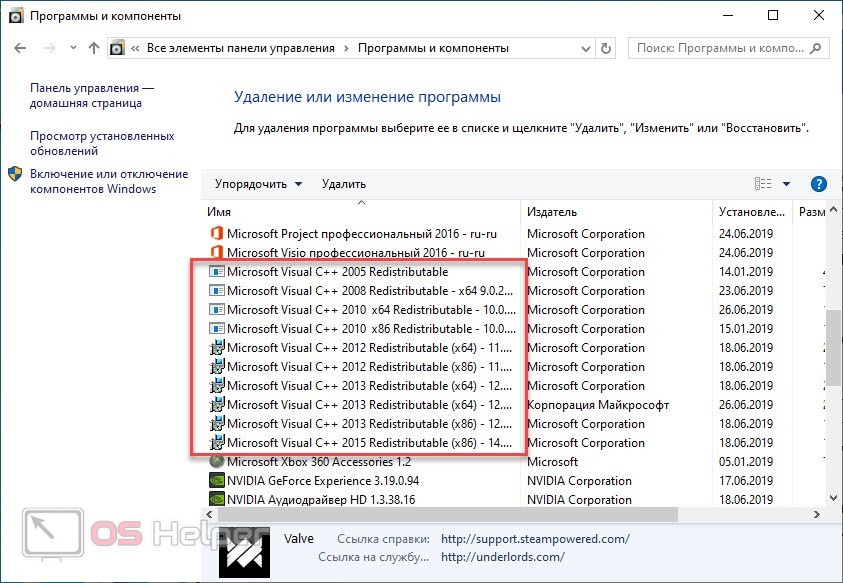
На компьютере под управлением Windows 10 установщик можно найти в списке по букве V (Установщик Visual Studio) или по букве M (Установщик Microsoft Visual Studio).On a computer running Windows 10, you can find the installer under the letter V as the Visual Studio Installer, or under the letter M as the Microsoft Visual Studio Installer.
-
На странице Продукт установщика найдите установленный ранее выпуск Visual Studio.On the Product page in the installer, look for the edition of Visual Studio that you installed previously.
-
Если обновление доступно, вы увидите кнопку Обновить.If an update is available, you see an Update button. (Поиск доступных обновлений может занять несколько секунд.)(It might take a few seconds for the installer to determine whether an update is available.)
Чтобы установить обновления, нажмите кнопку Обновить.Choose the Update button to install the updates.
Step 4 — Choose workloads
After the installer is installed, you can use it to customize your installation by selecting the feature sets—or workloads—that you want. Here’s how.
-
Find the workload you want in the Visual Studio Installer.
For example, choose the «.NET desktop development» workload. It comes with the default core editor, which includes basic code editing support for over 20 languages, the ability to open and edit code from any folder without requiring a project, and integrated source code control.
-
After you choose the workload(s) you want, choose Install.
Next, status screens appear that show the progress of your Visual Studio installation.
-
Find the workload you want in the Visual Studio Installer.
For example, choose the «ASP.NET and web development» workload. It comes with the default core editor, which includes basic code editing support for over 20 languages, the ability to open and edit code from any folder without requiring a project, and integrated source code control.
-
After you choose the workload(s) you want, choose Install.
Next, status screens appear that show the progress of your Visual Studio installation.
Tip
At any time after installation, you can install workloads or components that you didn’t install initially. If you have Visual Studio open, go to Tools > Get Tools and Features… which opens the Visual Studio Installer. Or, open Visual Studio Installer from the Start menu. From there, you can choose the workloads or components that you wish to install. Then, choose Modify.
Шаг 5. Выбор отдельных компонентов (необязательно)Step 5 — Choose individual components (Optional)
Если вы не хотите пользоваться функцией рабочих нагрузок для настройки установки Visual Studio или хотите добавить дополнительные компоненты, которые не устанавливает рабочая нагрузка, это можно сделать путем установки или добавления отдельных компонентов на вкладке Отдельные компоненты. Выберите нужные компоненты и следуйте указаниям.If you don’t want to use the Workloads feature to customize your Visual Studio installation, or you want to add more components than a workload installs, you can do so by installing or adding individual components from the Individual components tab. Choose what you want, and then follow the prompts.
Step 1 — Make sure your computer is ready for Visual Studio
Before you begin installing Visual Studio:
-
Check the system requirements. These requirements help you know whether your computer supports Visual Studio 2017.
-
Apply the latest Windows updates. These updates ensure that your computer has both the latest security updates and the required system components for Visual Studio.
-
Reboot. The reboot ensures that any pending installs or updates don’t hinder the Visual Studio install.
-
Free up space. Remove unneeded files and applications from your %SystemDrive% by, for example, running the Disk Cleanup app.
-
Check the system requirements. These requirements help you know whether your computer supports Visual Studio 2019.
-
Apply the latest Windows updates. These updates ensure that your computer has both the latest security updates and the required system components for Visual Studio.
-
Reboot. The reboot ensures that any pending installs or updates don’t hinder the Visual Studio install.
-
Free up space. Remove unneeded files and applications from your %SystemDrive% by, for example, running the Disk Cleanup app.
For questions about running previous versions of Visual Studio side by side with Visual Studio 2017, see the .
For questions about running previous versions of Visual Studio side by side with Visual Studio 2019, see the Visual Studio 2019 Platform Targeting and Compatibility page.
Скачивание загрузчика Visual StudioDownload the Visual Studio bootstrapper
Скачайте файл начального загрузчика для нужного выпуска Visual Studio.Download a bootstrapper file for the edition of Visual Studio you want. Нажмите кнопку Сохранить и выберите Открыть папку.Make sure to choose Save, and then choose Open folder.
Чтобы получить последнюю версию начального загрузчика для Visual Studio 2017 версии 15.9, перейдите на страницу с предыдущими версиями Visual Studio и скачайте один из следующих файлов начального загрузчика:To get the latest bootstrapper for Visual Studio 2017 version 15.9, go to the Visual Studio previous versions page and download one of the following bootstrapper files:
| ВыпускEdition | имя_файлаFilename |
|---|---|
| Visual Studio 2017 Enterprise версии 15.9Visual Studio 2017 Enterprise version 15.9 | vs_enterprise.exevs_enterprise.exe |
| Visual Studio 2017 Professional версии 15.9Visual Studio 2017 Professional version 15.9 | vs_professional.exevs_professional.exe |
| Visual Studio 2017 Build Tools версии 15.9Visual Studio 2017 Build Tools version 15.9 | vs_buildtools.exevs_buildtools.exe |
Другие поддерживаемые начальные загрузчики: vs_feedbackclient.exe, vs_teamexplorer.exe, vs_testagent.exe, vs_testcontroller.exe и vs_testprofessional.exe.Other supported bootstrappers include vs_feedbackclient.exe, vs_teamexplorer.exe, vs_testagent.exe, vs_testcontroller.exe, and vs_testprofessional.exe.
Начните со скачивания начального загрузчика Visual Studio 2019 с веб-страницы загрузки Visual Studio или страницы с для выбранной версии и выпуска Visual Studio.Start by downloading the Visual Studio 2019 bootstrapper from either the Visual Studio downloads page or the page for your chosen version and edition of Visual Studio. Исполняемый файл программы установки, —а точнее файл начального загрузчика—, должен иметь одно из перечисленных ниже имен или похожее на него.Your setup executable—or to be more specific, a bootstrapper file—will match or be similar to one of the following:
| ВыпускEdition | СкачатьDownload |
|---|---|
| Visual Studio EnterpriseVisual Studio Enterprise | vs_enterprise.exevs_enterprise.exe |
| Visual Studio ProfessionalVisual Studio Professional | vs_professional.exevs_professional.exe |
| Visual Studio Build ToolsVisual Studio Build Tools | vs_buildtools.exevs_buildtools.exe |
Другие поддерживаемые начальные загрузчики: vs_teamexplorer.exe, vs_testagent.exe и vs_testcontroller.exe.Other supported bootstrappers include vs_teamexplorer.exe, vs_testagent.exe, and vs_testcontroller.exe.
Совет
Если вы ранее скачали файл начального загрузчика и хотите проверить его версию, сделайте следующее.If you previously downloaded a bootstrapper file and want to verify what version it is, here’s how. В Windows откройте проводник, щелкните правой кнопкой мыши файл начального загрузчика, выберите Свойства, перейдите на вкладку Подробно, а затем найдите номер в строке Версия продукта.In Windows, open File Explorer, right-click the bootstrapper file, choose Properties, choose the Details tab, and then view the Product version number. Чтобы сопоставить этот номер с выпуском Visual Studio, перейдите на страницу Номера сборки и даты выпуска Visual Studio.To match that number to a release of Visual Studio, see Visual Studio build numbers and release dates.
Совет
Если вы ранее скачали файл начального загрузчика и хотите проверить его версию, сделайте следующее.If you previously downloaded a bootstrapper file and want to verify what version it is, here’s how. В Windows откройте проводник, щелкните правой кнопкой мыши файл начального загрузчика, выберите Свойства, перейдите на вкладку Подробно, а затем найдите номер в строке Версия продукта.In Windows, open File Explorer, right-click the bootstrapper file, choose Properties, choose the Details tab, and then view the Product version number. Чтобы сопоставить этот номер с выпуском Visual Studio, перейдите на страницу Выпуски Visual Studio 2019.To match that number to a release of Visual Studio, see Visual Studio 2019 Releases.
ДиагностикаDiagnostics
Мы продолжаем совершенствовать возможности диагностики в Visual Studio.We continue to improve diagnostics capabilities in Visual Studio. Сейчас мы работаем над возможностями отладки приложений .Net Core в Linux и уже улучшили анализ производственных проблем и диагностику внутреннего цикла:This period we are focusing on debugging .Net Core apps on Linux, improved production issue analysis, and improved inner-loop diagnostics:
-
Сбор и анализ данных из рабочих служб для решения распространенных проблемCollect and analyze data from production services to resolve common problems
- Автоматический анализ очереди метода завершения .NET Core .NET Core finalizer queue auto analysis
- Использование автоматического анализатора для обнаружения взаимоблокировок в дампах памяти Use the Auto Analyzer to detect deadlocks in memory dumps
- Анализ очереди метода завершения в дампе памяти с улучшенной эвристикойAnalyze the finalizer queue in a memory dump with improved heuristics
- Возможность диагностического анализа по дампам ядра LinuxEnable diagnostic analysis over Linux core dumps
- Быстрый анализ дампа памяти для всех исключений в кучеQuickly analyze a memory dump for all exceptions on the heap
- Быстрый анализ дампов для регулярных выражений с высоким уровнем использованияQuickly analyze dumps for high usage regular expressions
- Быстрый анализ дампов с исключениями нехватки памятиQuickly analyze dumps with Out of Memory exceptions
- Быстрый анализ дампов с исключением переполнения стекаQuickly analyze dumps with Stack Overflow Exception
-
Анализ трассировки производительности ASP.NET Core за считаные секундыAnalyze ASP.NET Core performance traces in seconds
- Динамическое профилирование инструментирования для .NET Core Dynamic instrumentation profiling for .NET Core
- Диаграмма Flamechart для визуализации трассировок ЦПFlamechart for visualizing CPU traces
- Улучшение времени создания дерева вызовов для средства выделения .NET на 25 % по сравнению с текущим значениемImprove calltree building time for .NET Alloc tool by 25% of current
-
Диагностика проблем в приложениях .NET Core, работающих на платформе LinuxDiagnose issues in .NET Core apps running on Linux
- Инструмент «Закрепляемые свойства» для отладки .NET Core на разных платформах ‘Pinnable Properties’ for cross platform .NET Core debugging
- Средство выделения памяти для .NET Core в Linux.NET memory allocation tool for .NET Core on Linux
-
Отладка приложений с помощью Служб приложений для Linux, ARM64 .NET Core в Linux и .NET 5Debug apps using App Services for Linux, ARM64 .NET Core on Linux and .NET 5
- Поддержка отладки однофайловых исполняемых файлов в .NET 5 Debugging support for .NET 5 single file executables
- Разработчики, использующие .NET 5, получили необходимые функции отладчика Developers using .NET 5 have the debugger features they expect
- Отладка GitHub CodespacesDebug GitHub Codespaces
Следующие шагиNext steps
Узнайте больше о Visual Studio, прочитав одну из следующих вводных статей:Explore Visual Studio further by following along with one of these introductory articles:
-
Познакомьтесь с редактором кода в статье Сведения об использовании редактора кодаGet acquainted with the code editor in Learn to use the code editor
-
Узнайте, как Visual Studio упорядочивает код, в статье Сведения о проектах и решенияхLearn how Visual Studio organizes code in Learn about projects and solutions
Если вы готовы к углубиться в вопросы написания кода, ознакомьтесь со следующими статьями о конкретных языках:If you’re ready to dive into more coding, one of the following language-specific quickstarts is a good next step:
Шаг 3. Установка установщика Visual StudioStep 3 — Install the Visual Studio installer
Запустите файл начального загрузчика, чтобы установить Visual Studio Installer.Run the bootstrapper file to install the Visual Studio Installer. Новый установщик имеет меньший размер и включает все необходимое для установки и настройки Visual Studio.This new lightweight installer includes everything you need to both install and customize Visual Studio.
-
В папке Загрузки дважды щелкните файл начального загрузчика, имя которого совпадает с именем одного из следующих файлов или похоже на них:From your Downloads folder, double-click the bootstrapper that matches or is similar to one of the following files:
- vs_community.exe для Visual Studio Community.vs_community.exe for Visual Studio Community
- vs_professional.exe для Visual Studio Professional;vs_professional.exe for Visual Studio Professional
- vs_enterprise.exe для Visual Studio Enterprise;vs_enterprise.exe for Visual Studio Enterprise
Если появляется оповещение системы контроля учетных записей, нажмите кнопку Да.If you receive a User Account Control notice, choose Yes.
-
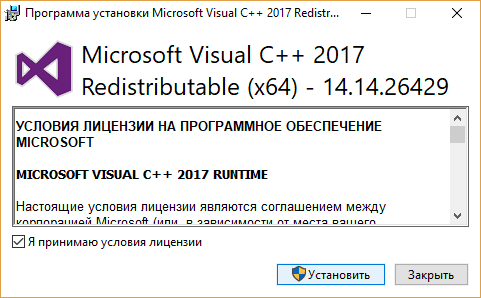
Мы попросим вас принять условия лицензии и заявление о конфиденциальности корпорации Майкрософт.We’ll ask you to acknowledge the Microsoft License Terms and the Microsoft Privacy Statement. Нажмите Продолжить.Choose Continue.
-
ASP.NET, ASP.NET Core, Node.js и Python. С помощью средства публикации вы можете выполнить развертывание на веб-сайт, используя FTP или веб-развертывание.ASP.NET, ASP.NET Core, Node.js, and Python: You can use the Publish tool to deploy to a website by using FTP or Web Deploy. Дополнительные сведения см. в статье Публикация веб-приложения на веб-сайте с помощью Visual Studio.For more information, see Deploy to a website.
В Обозревателе решений щелкните проект правой кнопкой мыши и выберите Опубликовать.In Solution Explorer, right-click the project and select Publish. (Если профили публикации не были настроены ранее, необходимо щелкнуть Создать профиль.) В средстве публикации выберите нужный вариант и выполните инструкции по настройке.(If you’ve previously configured any publishing profiles, you must then select Create new profile.) In the Publish tool, select the option you want and follow the configuration steps.
Дополнительные сведения об импорте профиля публикации в Visual Studio см. в статье Импорт параметров публикации и развертывание в IIS.For information on importing a publish profile in Visual Studio, see Import publish settings and deploy to IIS.
Также вы можете развертывать приложения и службы ASP.NET некоторыми другими способами.You can also deploy ASP.NET applications and services in a number of other ways. Дополнительные сведения см. в статье Развертывание веб-приложений и служб ASP.NET.For more information, see Deploying ASP.NET web applications and services.
-
Классические приложения Windows. Вы можете публиковать классическое приложение Windows на веб-сервере или в общей сетевой папке, используя развертывание ClickOnce.Windows desktop: You can publish a Windows desktop application to a web server or a network file share by using ClickOnce deployment. Затем пользователи смогут устанавливать приложение одним щелчком.Users can then install the application with a single click. Дополнительные сведения см. в следующих статьях:For more information, see the following articles:
- Развертывание классического приложения Windows .NET Framework с помощью ClickOnceDeploy a .NET Framework Windows desktop app using ClickOnce
- Развертывание классического приложения Windows .NET с помощью ClickOnceDeploy a .NET Windows desktop app using ClickOnce
- Развертывание приложения C++/CLR с помощью ClickOnceDeploy a C++/CLR app using ClickOnce
Функции нацеливания на платформуFramework targeting features
Среди прочего, доступны следующие возможности нацеливания на платформу:Framework targeting includes the following features:
-
При открытии проекта, который ориентирован на более раннюю версию платформы, Visual Studio может автоматически обновить его или оставить имеющуюся настройку.When you open a project that targets an earlier framework version, Visual Studio can automatically upgrade the project or leave the target as-is.
-
При создании проекта .NET Framework можно указать версию платформы .NET Framework, на которую требуется ориентироваться.When you create a .NET Framework project, you can specify the version of the .NET Framework that you want to target.
-
Вы можете в одном проекте.You can in a single project.
-
В каждом из нескольких проектов в одном решении можно ориентироваться на разные версии .NET.You can target a different version of .NET in each of several projects in the same solution.
-
Можно изменить версию .NET, на которую ориентирован существующий проект.You can change the version of .NET that an existing project targets.
При изменении версии платформы .NET, на которую сориентирован проект, Visual Studio вносит все необходимые изменения в ссылки и файлы конфигурации.When you change the version of .NET that a project targets, Visual Studio makes any required changes to references and configuration files.
При работе над проектом, ориентированным на более раннюю версию платформы, Visual Studio динамически изменяет среду разработки, как показано ниже:When you work on a project that targets an earlier framework version, Visual Studio dynamically changes the development environment, as follows:
-
Фильтрует элементы в диалоговых окнах Добавить новый элемент, Добавить новую ссылку и Добавление ссылки на службу, чтобы пропустить варианты, которые недоступны в целевой версии.It filters items in the Add New Item dialog box, the Add New Reference dialog box, and the Add Service Reference dialog box to omit choices that are not available in the targeted version.
-
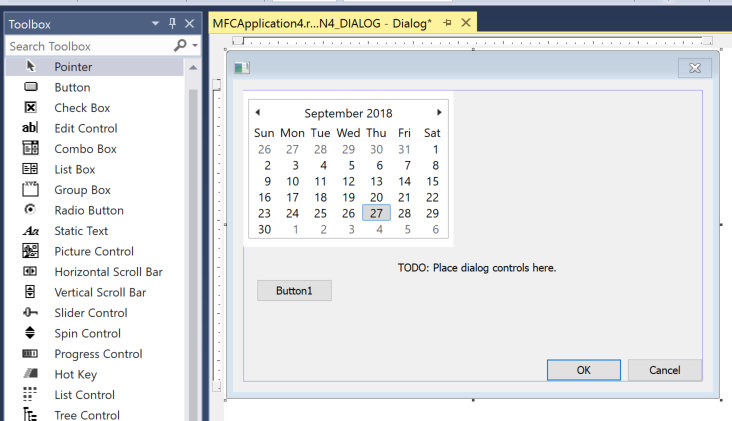
Фильтрует пользовательские элементы управления на панели элементов, чтобы удалить те из них, которые недоступны в целевой версии, и отобразить только наиболее актуальные элементы, если доступно несколько элементов управления.It filters custom controls in the Toolbox to remove those that are not available in the targeted version and to show the only the most up-to-date controls when multiple controls are available.
-
Фильтрует IntelliSense, чтобы пропустить языковые функции, которые недоступны в целевой версии.It filters IntelliSense to omit language features that aren’t available in the targeted version.
-
Фильтрует свойства в окне Свойства, чтобы пропустить те, которые недоступны в целевой версии.It filters properties in the Properties window to omit those that aren’t available in the targeted version.
-
Фильтрует пункты меню, чтобы пропустить те, которые недоступны в целевой версии.It filters menu options to omit options that aren’t available in the targeted version.
-
Для сборок система использует версию и параметры компилятора, которые подходят для целевой версии.For builds, it uses the version of the compiler and the compiler options that are appropriate for the targeted version.
Примечание
- Нацеливание на платформу не гарантирует правильную работу приложения.Framework targeting does not guarantee that your application will run correctly. Нужно протестировать приложение, чтобы убедиться в том, что оно работает с целевой версией.You must test your application to make sure it runs against the targeted version.
- Ориентироваться на версии платформы, предшествующие .NET Framework 2.0, запрещено.You cannot target framework versions below .NET Framework 2.0.
Техническая поддержкаGet support
Иногда возникают проблемы.Sometimes, things can go wrong. Если установить Visual Studio не удается, воспользуйтесь пошаговыми указаниями в статье Устранение неполадок при установке и обновлении Visual Studio.If your Visual Studio installation fails, see Troubleshoot Visual Studio installation and upgrade issues for step-by-step guidance.
Также доступен , предназначенный для оказания помощи при проблемах с установкой (только на английском языке).We also offer an (English only) support option for installation-related issues.
Ниже приведены несколько дополнительных вариантов:Here are a few more support options:
- Вы можете сообщить о проблемах с продуктом, используя средство Сообщить о проблеме. Оно доступно как в Visual Studio Installer, так и в IDE Visual Studio.Report product issues to us via the Report a Problem tool that appears both in the Visual Studio Installer and in the Visual Studio IDE.
- Вы можете предлагать новые функции, просматривать описания проблем и искать решения в сообществе разработчиков Visual Studio.Suggest a feature, track product issues, and find answers in the Visual Studio Developer Community.
- Вы также можете связаться с нами и другими разработчиками Visual Studio, используя свою учетную запись GitHub в обсуждении Visual Studio в сообществе Gitter.Use your GitHub account to talk to us and other Visual Studio developers in the Visual Studio conversation in the Gitter community.
List of Utilities for Visual Studio 2019
This is the «Utilities List» that is referenced in the «Utilities» section of Microsoft Software License Terms for certain editions of Visual Studio 2019 (the «software»).
Depending on the specific edition of the software, the software you received may not include all of the files on this list. To determine your rights with respect to the
following files, please refer to the Visual Studio License Terms that came with your edition of the software. You may not modify these files.
\Common7\IDE\CommonExtensions\Microsoft\IntelliTrace\IntelliTraceCollection.cab
vs_remotetools.exe (x86, x64, ARM64 versions)
\Team Tools\Performance Tools\Setups\vs_profiler\_x64_.exe
Visual C++ Utilities
The «Utilities List» includes the following files within the subfolders of the directories specified:
- \VC\Auxiliary\VS\redist\GraphicsDbgRedist\
- VsGraphicsHelper.dll
- VsGraphicsResources.dll
- \VC\Redist\MSVC\\debug_nonredist\
- concrt140d.dll
- mfc140ud.dll
- mfcm140ud.dll
- msvcp140d.dll
- msvcp140_1d.dll
- msvcp140_2d.dll
- vcamp140d.dll
- vccorlib140d.dll
- vcomp140d.dll
- vcruntime140d.dll
- vcruntime140_1d.dll
- \VC\Tools\MSVC\\bin\
- pgort140.dll
- pgort140ui.dll
- pgosweep.exe
Как эффективнее работать с C#
Для эффективной работы полезно знать о дополнительных инструментах. Вот некоторые из них:
- WPF (Windows Presentation Foundation) поможет легко и быстро создать интерфейс для любых экранов, уменьшает количество кода, отображающего интерфейс.
- Xamarin — фреймворк для разработки кроссплатформенных приложений для Windows Phone, Android и iOS. То есть вы напишете один код, и он сразу будет работать на всех основных платформах.
- ASP.NET помогает просто и быстро связать серверный код с клиентским в серверных приложениях и веб-разработке.
- Entity Framework — один из лучших фреймворков для работы с базами данных. Позволяет работать с данными как с объектами.
- LINQ (Language Integrated Query) — мини-язык запросов, встроенный в C# и позволяющий легко выбирать, фильтровать, сортировать и группировать любые данные из любых источников: баз данных, массивов, структур, файлов и так далее.
- Visual Studio — среда разработки, созданная специально для языка C#.
Писать код в среде разработки удобно. У неё много плюсов, например:
Показывать дополнительные конфигурации построенияShow advanced build configurations
Если этот флажок установлен, параметры конфигурации сборки будут отображаться в диалоговом окне Страницы свойств проекта и в диалоговом окне Страницы свойств решения.When selected, the build configuration options appear on the Project Property Pages dialog box and the Solution Property Pages dialog box. Если флажок снят, параметры конфигурации сборки не отображаются в диалоговом окне Страницы свойств проекта и в диалоговом окне Страницы свойств решения для проектов Visual Basic и C#, содержащих одну конфигурацию или две конфигурации отладки и выпуска.When cleared, the build configuration options do not appear on the Project Property Pages dialog box and the Solution Property Pages dialog box for Visual Basic and C# projects that contain one configuration or the two configurations debug and release. Если проект содержит определяемую пользователем конфигурацию, отображаются параметры конфигурации сборки.If a project has a user-defined configuration, the build configuration options are shown.
Если флажок снят, команды в меню Сборка, такие как Собрать решение, Перестроить решение и Очистить решение, выполняются для конфигурации «Выпуск», а команды в меню Отладка, такие как Начать отладку и Запуск без отладки, выполняются для конфигурации «Отладка».When unselected, the commands on the Build menu, such as Build Solution, Rebuild Solution, and Clean Solution, are performed on the Release configuration and the commands on the Debug menu, such as Start Debugging and Start Without Debugging, are performed on the Debug configuration.