Python requests post
Содержание:
- urllib
- Retrieving definitions from a dictionary
- Our First Request
- JavaScript Support
- Заголовки ответов
- Headers
- Содержимое ответа
- PHP GET request in Symfony
- Redirect with nginx
- Асинхронность
- Аутентификация
- PHP POST request in Symfony
- Using the Translate API
- Заголовки
- Объект Response
- PHP GET request in Laravel
- Python requests get method
- Текст ответа
- Более сложные POST запросы
- PHP POST request in Slim
- HTTP-коды состояний
- Редиректы и история
- Python process GET request in Flask
urllib
См.также
- Лекции Р. Сузи
- https://docs.python.org/3/library/urllib.request.html
- https://docs.python.org/3/howto/urllib2.html
import urllib.request
doc = urllib.request.urlopen("http://lectureswww.readthedocs.org")
print(doc.read())
<!DOCTYPE html> <!--><html class="no-js lt-ie9" lang="en" > <!--> <!--><!--> <html class="no-js" lang="en" > <!--<!--> <head> <meta charset="utf-8"> <meta name="viewport" content="width=device-width, initial-scale=1.0"> <title>Основы Веб-программирования — Документ
Функция создает файлоподобный объект,
который читается методом .
Другие методы этого объекта:
,
,
,
,
работают как и у обычного файла, а также есть метод
, который возвращает
соответствующий полученному с сервера Message-объект.
Его можно использовать для получения дополнительной информации:
import urllib.request
doc = urllib.request.urlopen("http://lectureswww.readthedocs.org")
print(doc.info())
Server nginx1.4.6 (Ubuntu)
X-Deity chimera-lts
Vary Accept-Encoding
X-Served Nginx
Content-Type texthtml
Date Thu, 05 Feb 2015 133041 GMT
Accept-Ranges bytes
ETag "54c74bc0-62a2"
Connection close
X-Subdomain-TryFiles True
Last-Modified Tue, 27 Jan 2015 082640 GMT
Content-Length 25250
С помощью функции можно делать и более
сложные вещи, например, передавать web-серверу данные формы. Как
известно, данные заполненной web-формы могут быть переданы на
web-сервер с использованием метода GET или метода POST. Метод GET
связан с кодированием всех передаваемых параметров после знака «?» в
URL, а при методе POST данные передаются в теле HTTP-запроса.
Оба варианта передачи представлены ниже:
import urllib.request
import urllib.parse

data = {"s" "Веб программирование"}
enc_data = urllib.parse.urlencode(data)

# GET запрос
f = urllib.request.urlopen("http://nigma.ru/" + "?" + enc_data)
print(f.read())

# POST запрос
f = urllib.request.urlopen("http://nigma.ru/", enc_data.encode('utf-8'))
print(f.read())
В некоторых случаях данные имеют повторяющиеся имена. В этом случае в качестве
параметра можно использовать вместо словаря
последовательность пар имя-значение:
import urllib.parse
data = [("n", "1"), ("n", "3"), ("n", "4"), ("button", "Привет"),
enc_data = urllib.parse.urlencode(data)
print(enc_data)
n=1&n=3&n=4&button=%D0%9F%D1%80%D0%B8%D0%B2%D0%B5%D1%82
Модуль позволяет загружать web-объекты через
прокси-сервер. Если ничего не указывать, будет использоваться прокси-сервер,
который был задан принятым в конкретной ОС способом. В Unix прокси-серверы
задаются в переменных окружения , и т.п., в Windows
прокси-серверы записаны в реестре, а в Mac OS они берутся из конфигурации
Internet. Задать прокси-сервер можно через
:
Retrieving definitions from a dictionary
In the following example, we find definitions of a term
on the www.dictionary.com.
To parse HTML, we use the module.
$ pip install lxml
We install the module with
the tool.
get_term.py
#!/usr/bin/env python3

import requests as req
from lxml import html
import textwrap

term = "dog"

resp = req.get("http://www.dictionary.com/browse/" + term)
root = html.fromstring(resp.content)

for sel in root.xpath("//span"):

    if sel.text:

        s = sel.text.strip()

        if (len(s) > 3):

            print(textwrap.fill(s, width=50))
In this script, we find the definitions of the term dog on .
The module is used to parse the HTML code.
Note: The tags that contain the definitions may change overnight.
In such case we would need to adapt the script.
from lxml import html
The module can be used to parse HTML.
import textwrap
The module is used to wrap text to a certain width.
resp = req.get("http://www.dictionary.com/browse/" + term)
To perform a search, we append the term at the end of the URL.
root = html.fromstring(resp.content)
We need to use rather than
because implicitly expects bytes as input.
(The returns content in bytes whereas
as Unicode text.
for sel in root.xpath("//span"):

    if sel.text:

        s = sel.text.strip()

        if (len(s) > 3):

            print(textwrap.fill(s, width=50))
We parse the content. The main definitions are located inside the tag, which
has the attribute.
We improve the formatting by removing excessive white space and stray
characters. The text width has maximum of 50 characters. Note that such parsing
is subject to change.
$ ./get_term.py
a domesticated canid,
any carnivore of the dog family Canidae, having
prominent canine teeth and, in the wild state, a
long and slender muzzle, a deep-chested muscular
body, a bushy tail, and large, erect ears.
...
This is a partial list of the definitions.
Our First Request
To start, let’s use Requests for something simple: requesting the Scotch.io site. Create a file called script.py and add the following code to it. In this article, we won’t have much code to work with, so when something changes you can just update the existing code instead of adding new lines.
So all this code is doing is sending a GET request to Scotch.io. This is the same type of request your browser sent to view this page, but the only difference is that Requests can’t actually render the HTML, so instead you will just get the raw HTML and the other response information.
We’re using the .get() function here, but Requests allows you to use other functions like .post() and .put() to send those requests as well.
You can run it by executing the script.py file.
And here’s what you get in return: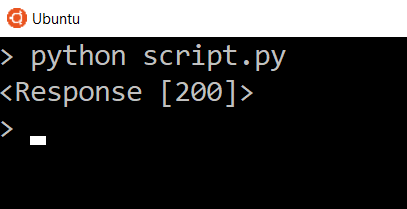
JavaScript Support
>>> r = session.get('https://pythonclock.org')
Let’s try and see the dynamically rendered code (The countdown clock). To do that quickly at first, we’ll search between the last text we see before it (‘Python 2.7 will retire in…’) and the first text we see after it (‘Enable Guido Mode’).
>>> r.html.search('Python 2.7 will retire in...{}Enable Guido Mode')[]
'</h1>\n        </div>\n        <div class="python-27-clock"></div>\n        <div class="center">\n            <div class="guido-button-block">\n                <button class="js-guido-mode guido-button">'
Notice the clock is missing. The method takes the response and renders the dynamic content just like a web browser would.
>>> r.html.render()
>>> r.html.search('Python 2.7 will retire in...{}Enable Guido Mode')[]
'</h1>\n        </div>\n        <div class="python-27-clock is-countdown"><span class="countdown-row countdown-show6"><span class="countdown-section"><span class="countdown-amount">1</span><span class="countdown-period">Year</span></span><span class="countdown-section"><span class="countdown-amount">2</span><span class="countdown-period">Months</span></span><span class="countdown-section"><span class="countdown-amount">28</span><span class="countdown-period">Days</span></span><span class="countdown-section"><span class="countdown-amount">16</span><span class="countdown-period">Hours</span></span><span class="countdown-section"><span class="countdown-amount">52</span><span class="countdown-period">Minutes</span></span><span class="countdown-section"><span class="countdown-amount">46</span><span class="countdown-period">Seconds</span></span></span></div>\n        <div class="center">\n            <div class="guido-button-block">\n                <button class="js-guido-mode guido-button">'
Let’s clean it up a bit. This step is not needed, it just makes it a bit easier to visualize the returned html to see what we need to target to extract our required information.
       >>> from pprint import pprint
       >>> pprint(r.html.search('Python 2.7 will retire in...{}Enable'))
       ('</h1>\n'
'        </div>\n'
'        <div class="python-27-clock is-countdown"><span class="countdown-row '
'countdown-show6"><span class="countdown-section"><span '
'class="countdown-amount">1</span><span '
'class="countdown-period">Year</span></span><span '
'class="countdown-section"><span class="countdown-amount">2</span><span '
'class="countdown-period">Months</span></span><span '
'class="countdown-section"><span class="countdown-amount">28</span><span '
'class="countdown-period">Days</span></span><span '
'class="countdown-section"><span class="countdown-amount">16</span><span '
'class="countdown-period">Hours</span></span><span '
'class="countdown-section"><span class="countdown-amount">52</span><span '
'class="countdown-period">Minutes</span></span><span '
'class="countdown-section"><span class="countdown-amount">46</span><span '
'class="countdown-period">Seconds</span></span></span></div>\n'
'        <div class="center">\n'
'            <div class="guido-button-block">\n'
'                <button class="js-guido-mode guido-button">')
The rendered html has all the same methods and attributes as above. Let’s extract just the data that we want out of the clock into something easy to use elsewhere and introspect like a dictionary.
>>> periods =
>>> amounts =
>>> countdown_data = dict(zip(periods, amounts))
>>> countdown_data
{'Year': '1', 'Months': '2', 'Days': '5', 'Hours': '23', 'Minutes': '34', 'Seconds': '37'}
Or you can do this async also:
>>> async def get_pyclock():
...     r = await asession.get('https://pythonclock.org/')
...     await r.html.arender()
...     return r
...
>>> results = asession.run(get_pyclock, get_pyclock, get_pyclock)
The rest of the code operates the same way as the synchronous version except that is a list containing multiple response objects however the same basic processes can be applied as above to extract the data you want.
Note, the first time you ever run the method, it will download
Chromium into your home directory (e.g. ). This only happens
once.
Заголовки ответов
Мы можем просматривать заголовки ответа сервера, используя словарь Python:
>>> r.headers { 'content-encoding': 'gzip', 'transfer-encoding': 'chunked', 'connection': 'close', 'server': 'nginx/1.0.4', 'x-runtime': '148ms', 'etag': '"e1ca502697e5c9317743dc078f67693f"', 'content-type': 'application/json' }
Однако это словарь особого рода: он сделан специально для HTTP заголовков. Согласно RFC 7230, имена заголовков HTTP нечувствительны к регистру.
Таким образом, мы можем получить доступ к заголовкам с любым написанием:
>>> r.headersContent-Type']
'application/json'
>>> r.headers.get('content-type')
'application/json'
Headers
Another thing you can get from the response are the headers. You can take a look at them by using the headers dictionary on the response object.

Headers are sent along with the request and returned in the response. Headers are used so both the client and the server know how to interpret the data that is being sent and received in the response/response.
We see the various headers that are returned. A lot of times you won’t need to use the header information directly, but it’s there if you need it.
The content type is usually the one you may need because it reveals the format of the data, for example HTML, JSON, PDF, text, etc. But the content type is normally handled by Requests so you can easily access the data that gets returned.
Содержимое ответа
Мы можем читать содержимое различными способами, используя атрибуты и функции, предоставляемые модулем requests.
r.status_code возвращает код, указывающий, был ли запрос успешным или нет. 200 означает успешный. Общие коды статусов, которые вы, вероятно, видели — 200, 404 и 500. 404 означает ошибку клиента, а 500 означает ошибку сервера.
r.encoding возвращает кодировку ответа, основанную на HTTP заголовках.
r.url возвращает запрошенный URL.
r.json возвращает разобранные JSON данные из ответа.
r.text возвращает ответ в текстовом формате
r.content возвращает ответ, отформатированный в байтах
PHP GET request in Symfony
In the following example, we process a GET request in a Symfony application.
$ symfony new symreq
$ cd symreq
A new application is created.
$ composer req annot
$ composer req maker --dev
We install the and components.
$ php bin/console make:controller HomeController
We create a new controller.
src/Controller/HomeController.php
<?php

namespace App\Controller;

use Symfony\Bundle\FrameworkBundle\Controller\AbstractController;
use Symfony\Component\Routing\Annotation\Route;
use Symfony\Component\HttpFoundation\Response;
use Symfony\Component\HttpFoundation\Request;

class HomeController extends AbstractController
{
    /**
     * @Route("/", name="home", methods={"GET"})
     */
    public function index(Request $request): Response
    {
        $name = $request->query->get('name', 'guest');
        $message = $request->query->get('message', 'hello there');

        $output = "$name says: $message";

        return new Response($output, Response::HTTP_OK,
            ['content-type' => 'text/plain']);
    }
}
Inside the method,
we get the query parameters and create a response.
$name = $request->query->get('name', 'guest');
The GET parameter is retrieved with .
The second parameter of the method is a default value which is used when no
value was retrieved.
$ symfony serve
We start the server.
$ curl 'localhost:8000/?name=Lucia&message=Cau'
Lucia says: Cau
We generate a GET request with curl.
Redirect with nginx
In the next example, we show how to set up a page redirect in nginx server.
location = /oldpage.html {

        return 301 /newpage.html;
}
Add these lines to the nginx configuration file, which is located at
on Debian.
$ sudo service nginx restart
After the file has been edited, we must restart nginx to apply the
changes.
oldpage.html
<!DOCTYPE html>
<html>
<head>
<title>Old page</title>
</head>
<body>
<p>
This is old page
</p>
</body>
</html>
This is the file located in the nginx document root.
newpage.html
<!DOCTYPE html>
<html>
<head>
<title>New page</title>
</head>
<body>
<p>
This is a new page
</p>
</body>
</html>
This is the .
redirect3.py
#!/usr/bin/env python3

import requests as req

resp = req.get("http://localhost/oldpage.html")

print(resp.status_code)
print(resp.history)
print(resp.url)

print(resp.text)
This script accesses the old page and follows the redirect. As we already mentioned,
Requests follows redirects by default.
$ ./redirect3.py
200
(<Response >,)
http://localhost/files/newpage.html
<!DOCTYPE html>
<html>
<head>
<title>New page</title>
</head>
<body>
<p>
This is a new page
</p>
</body>
</html>
This is the output of the example.
$ sudo tail -2 /var/log/nginx/access.log
127.0.0.1 - - [21/Jul/2019:07:41:27 -0400] "GET /oldpage.html HTTP/1.1" 301 184
"-" "python-requests/2.4.3 CPython/3.4.2 Linux/3.16.0-4-amd64"
127.0.0.1 - - [21/Jul/2019:07:41:27 -0400] "GET /newpage.html HTTP/1.1" 200 109
"-" "python-requests/2.4.3 CPython/3.4.2 Linux/3.16.0-4-amd64"
As we can see from the file, the request was redirected
to a new file name. The communication consisted of two GET requests.
Асинхронность
Как объяснялось ранее, requests полностью синхронен. Он блокирует приложение в ожидании ответа сервера, замедляя работу программы. Создание HTTP-запросов в потоках является одним из решений, но потоки имеют свои собственные накладные расходы, и это подразумевает параллелизм, который не всегда каждый рад видеть в программе.
Начиная с версии 3.5, Python предлагает асинхронность внутри своего ядра, используя aiohttp. Библиотека aiohttp предоставляет асинхронный HTTP-клиент, построенный поверх asyncio. Эта библиотека позволяет отправлять запросы последовательно, но не дожидаясь первого ответа, прежде чем отправлять новый. В отличие от конвейерной передачи HTTP, aiohttp отправляет запросы по нескольким соединениям параллельно, избегая проблемы, описанной ранее.
Использование aiohttp
import aiohttp
import asyncio

async def get(url):
    async with aiohttp.ClientSession() as session:
        async with session.get(url) as response:
            return response

loop = asyncio.get_event_loop()

coroutines = [get("http://example.com") for _ in range(8)]

results = loop.run_until_complete(asyncio.gather(*coroutines))

print("Results: %s" % results)
Все эти решения (с использованием Session, thread, futures или asyncio) предлагают разные подходы к ускорению работы HTTP-клиентов. Но какая между ними разница с точки зрения производительности?
Аутентификация
Рассмотрим базовую
аутентификацию
на сайте httpbin
Придумайте любое имя пользоватлея и пароль к нему.
Я придумал andrey с паролем heihei
Перейдите на
httpbin.org
. Убедитесь, что в адресной строке стоит basic-auth/andrey/heihei
либо те логин и пароль, что придумали вы.
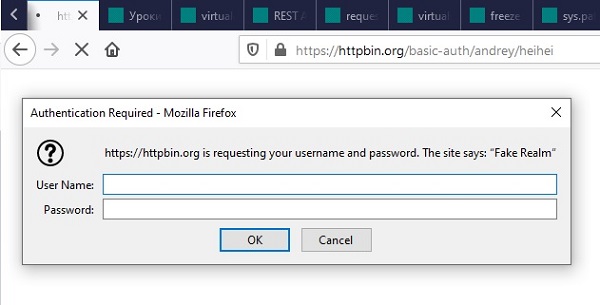
Введите ваши логин и пароль
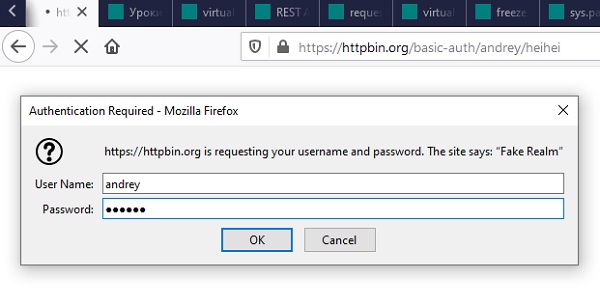
Убедитесь, что аутентификация прошла успешно

Теперь проделаем такую же аутентификацию с помощью Python
Создайте файл
auth_demo.py
со следующим кодом
python3 auth_demo.py
{
«authenticated»: true,
«user»: «andrey»
}
Ответ совпадает с тем что мы уже получали в браузере
Выполните такой же запрос, но с неправильным паролем. Убедитесь в том, что text ничего не содержит. Замените
print(r.text) на print(r) и убедитесь, что полученный объект это
<Response >
PHP POST request in Symfony
In the following example, we process a POST request in a Symfony application.
src/Controller/HomeController.php
<?php

namespace App\Controller;

use Symfony\Bundle\FrameworkBundle\Controller\AbstractController;
use Symfony\Component\Routing\Annotation\Route;
use Symfony\Component\HttpFoundation\Response;
use Symfony\Component\HttpFoundation\Request;

class HomeController extends AbstractController
{
    /**
     * @Route("/", name="home", methods={"POST"})
     */
    public function index(Request $request): Response
    {
        $name = $request->request->get('name', 'guest');
        $message = $request->request->get('message', 'hello there');

        $output = "$name says: $message";

        return new Response($output, Response::HTTP_OK,
            ['content-type' => 'text/plain']);
    }
}
We change the controller to process the POST request.
$name = $request->request->get('name', 'guest');
The POST parameter is retrieved with .
The second parameter of the method is a default value which is used when no
value was retrieved.
$ symfony serve
We start the server.
$ curl -d "name=Lucia" localhost:8000
Lucia says: hello there
We generate a POST request with curl.
Using the Translate API
So now let’s move on to something more interesting. We’ll use the Yandex Translate API to perform a request to translate some text to a different language.
To use the API, first you need to sign up. After you sign up, go to the Translate API and create an API key. Once you have the API key, add it to your file as a constant. Here’s the link where you can do all those things: https://tech.yandex.com/translate/

The reason why we need an API key is so Yandex can authenticate us every time we want to use their API. The API key is probably the simplest form of authentication, because it’s simply added on to the end of the request URL when being sent.
To know which URL we need to send to use the API, we can look at the documentation for Yandex here: https://tech.yandex.com/translate/doc/dg/reference/translate-docpage/
If we look there, we’ll see all the information needed to use their Translate API to translate text.
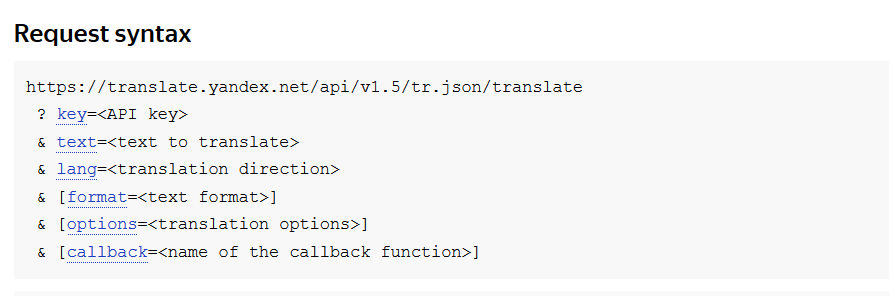
API documentation can be difficult to read at times, but in this case it’s simple. When we see a URL with ampersands (&), question marks (?), and equals signs (=), you can be sure that the URL is for GET requests. Those symbols specify the parameters that go along with the URL.
Normally things in square brackets ([]) will be optional. In this case, format, options, and callback are optional, while the key, text, and lang are required for the request.
And of course it’s easy to see the URL. So let’s add some code to send to that URL. You can replace the first request we created with this:
There are two ways we can add the parameters. We can either append it to the end of the URL directly, or we can have Requests do it for us. Having Requests do it for us is much easier.
To do that, we can create a dictionary for our parameters. The three items we need are the key, the text, and the language.
Let’s create the dictionary using the API key, ‘Hello’ for the text, and ‘en-es’ as the lang, which means we want to translate from English to Spanish.
If you need to know any other language codes, you can look here: https://en.wikipedia.org/wiki/List\_of\_ISO\_639-1\_codes You are looking for the 639-1 column.
We create a params dictionary by using the dict() function and passing in the keys and values we want in our dictionary.
Now we take the parameters dictionary and pass it to the .get() function.
When we pass the parameters this way, Requests will go ahead and add the parameters to the URL for us.
Now let’s add a print statement for the response text and view what gets returned in the response.
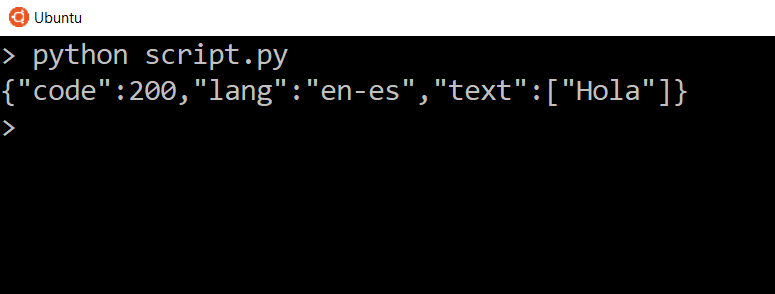
We see three things. We see the status code, which is exactly the same status code of the response itself, we see the language that we specified, and we see the translated text inside of the list. So you should see ‘Hola’ for the translated text.
Try again with en-fr as the language code, and you should see ‘Boujour’ in the response now.

Let’s take a look at the headers for this particular response.

Obviously the headers should be different because we’re communicating with a different server, but in this case the content type is application/json instead of text/html. What this means that the data can be interpreted as JSON.
When application/json is the content type of the response, we are able to have Requests convert the response to a dictionary and list so we can access the data easier.
To have the data parsed as JSON, we use the .json() method on the response object.
If you print it, you’ll see that the data looks the same, but the format is slightly different.

The reason why it’s different is because it’s no longer plain text that you get from res.text. This time it’s a printed version of a dictionary.
Let’s say we want to access the text. Since this is now a dictionary, we can use the text key.
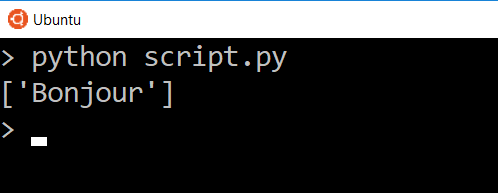
And now we only see the data for that one key. In this case we are looking at a list of one item, so if we wanted to get that text in the list directly, we can access it by the index.

And now the only thing we see is the translated word.
So of course if we change things in our parameters, we’ll get different results. Let’s change the text to be translated from Hello to Goodbye, change the target language back to Spanish, and send the request again.

Try translating longer text in different languages and see what responses the API gives you.
Заголовки
Также в ответе вы можете получить заголовки. Вы можете посмотреть их, используя словарь headers для объекта response.
script.py
Заголовки отправляются вместе с запросом и возвращаются с ответом. Заголовки используются для того, чтобы клиент и сервер понимали, как интерпретировать данные, отправляемые и получаемые в запросе и ответе.
Мы увидим в ответе несколько заголовков. Обычно информация из заголовков не требуется, однако если она вам нужна, вы можете ее получить.
Обычно требуется заголовок content type, поскольку он показывает формат данных, например HTML, JSON, PDF, обычный текст и т. д. Однако заголовок content type обрабатывается библиотекой Requests, и вы имеете доступ ко всем возвращаемым данным.
Объект Response
Response — это объект для проверки результатов запроса.
Давайте сделаем тот же запрос, но на этот раз сохраним его в переменную, чтобы мы могли более подробно изучить его атрибуты и поведение:
В этом примере вы захватили значение, возвращаемое значение , которое является экземпляром Response, и сохранили его в переменной response. Название переменной может быть любым.
Код ответа HTTP
Первый кусок данных, который можно получить из ответа — код состояния (он же код ответа HTTP). Код ответа информирует вас о состоянии запроса.
Например, статус означает, что ваш запрос был успешно выполнен, а статус означает, что ресурс не найден. Есть множество других ответов сервера, которые могут дать вам информацию о том, что произошло с вашим запросом.
Используя вы можете увидеть статус, который вернул вам в ответ сервер:
вернул 200 — это значит, что запрос успешно выполнен и сервер отдал вам запрашиваемые данные.
Иногда эту информацию можно использовать в коде для принятия решений:
Если сервер возвращает 200, то программа выведет , если код ответа 400, то программа выведет .
Requests делает еще один шаг к тому, чтобы сделать это проще. Если вы используете экземпляр Response в условном выражении, то он получит значение , если код ответа между 200 и 400, и False во всех остальных случаях.
Поэтому вы можете сделать проще последний пример, переписав :
Помните, что этот метод не проверяет, что код состояния равен 200.
Причиной этого является то, что ответы с кодом в диапазоне от 200 до 400, такие как и , тоже считаются истинными, так как они дают некоторый обрабатываемый ответ.
Например, статус 204 говорит о том, что запрос был успешным, но в теле ответа нет содержимого.
Поэтому убедитесь, что вы используете этот сокращенный вид записи, только если хотите узнать был ли запрос успешен в целом. А затем обработать код состояния соответствующим образом.
Если вы не хотите проверять код ответа сервера в операторе , то вместо этого вы можете вызвать исключение, если запрос был неудачным. Это можно сделать вызвав :
Если вы используете , то HTTPError сработает только для определенных кодов состояния. Если состояние укажет на успешный запрос, то исключение не будет вызвано и программа продолжит свою работу.
Теперь вы знаете многое о том, что делать с кодом ответа от сервера. Но когда вы делаете GET-запрос, вы редко заботитесь только об ответе сервера — обычно вы хотите увидеть больше.
Далее вы узнаете как просмотреть фактические данные, которые сервер отправил в теле ответа.
Content
Ответ на Get-запрос, в теле сообщения часто содержит некую ценную информацию, известную как «полезная нагрузка» («Payload»). Используя атрибуты и методы Response, вы можете просматривать payload в разных форматах.
Чтобы увидеть содержимое ответа в байтах, используйте :
Пока дает вам доступ к необработанным байтам полезной нагрузки ответа, вы можете захотеть преобразовать их в строку с использованием кодировки символов UTF-8. Response это сделает за вас, когда вы укажите :
Поскольку для декодирования байтов в строки требуется схема кодирования, Requests будет пытаться угадать кодировку на основе заголовков ответа. Вы можете указать кодировку явно, установив перед указанием :
Если вы посмотрите на ответ, то вы увидите, что на самом деле это последовательный JSON контент. Чтобы получить словарь, вы можете взять строку, которую получили из и десериализовать ее с помощью . Однако, более простой способ сделать это — использовать .
Тип возвращаемого значения — это словарь, поэтому вы можете получить доступ к значениям в объекте по ключу.
Вы можете делать многое с кодом состояний и телом сообщений. Но если вам нужна дополнительная информация, такая как метаданные о самом ответе, то вам нужно взглянуть на заголовки ответа.
Заголовки
Заголовки ответа могут дать вам полезную информацию, такую как тип ответа и ограничение по времени, в течение которого необходимо кэшировать ответ.
Чтобы посмотреть заголовки, укажите :
возвращает похожий на словарь объект, позволяющий получить доступ к значениям объекта по ключу. Например, чтобы получить тип содержимого ответа, вы можете получить доступ к Content-Type:
Используя ключ или — вы получите одно и то же значение.
Теперь вы узнали основное о Response. Вы увидели его наиболее используемые атрибуты и методы в действии. Давайте сделаем шаг назад и посмотрим как изменяются ответы при настройке Get-запросов.
PHP GET request in Laravel
In the following example, we process a GET request in Laravel.
$ laravel new larareq
$ cd larareq
We create a new Laravel application.
routes/web.php
<?php

use Illuminate\Support\Facades\Route;
use Illuminate\Http\Request;

Route::get('/', function (Request $request) {

    $name = $request->query('name', 'guest');
    $message = $request->query('message', 'hello there');
    $output = "$name says $message";

    return $output;
});
We get the GET parameters and create a response.
$ php artisan serve
We start the server.
$ curl 'localhost:8000/?name=Lucia&message=Cau'
Lucia says Cau
We send a GET request with curl.
Python requests get method
The method issues a GET request to the server.
The GET method requests a representation of the specified resource.
The is a freely available HTTP Request & Response Service.
mget.py
#!/usr/bin/env python3

import requests as req

resp = req.get("https://httpbin.org/get?name=Peter")
print(resp.text)
The script sends a variable with a value to the
server. The variable is specified directly in the URL.
$ ./mget.py
{
  "args": {
    "name": "Peter"
  },
  "headers": {
    "Accept": "*/*",
    "Accept-Encoding": "gzip, deflate",
    "Host": "httpbin.org",
    "User-Agent": "python-requests/2.21.0"
  },
  ...
}
This is the output of the example.
mget2.py
#!/usr/bin/env python3

import requests as req

payload = {'name': 'Peter', 'age': 23}
resp = req.get("https://httpbin.org/get", params=payload)

print(resp.url)
print(resp.text)
The method takes a parameter where
we can specify the query parameters.
payload = {'name': 'Peter', 'age': 23}
The data is sent in a Python dictionary.
resp = req.get("https://httpbin.org/get", params=payload)
We send a GET request to the site and
pass the data, which is specified in the parameter.
print(resp.url)
print(resp.text)
We print the URL and the response content to the console.
$ ./mget2.py
http://httpbin.org/get?name=Peter&age=23
{
  "args": {
    "age": "23",
    "name": "Peter"
  },
  "headers": {
    "Accept": "*/*",
    "Accept-Encoding": "gzip, deflate",
    "Host": "httpbin.org",
    "User-Agent": "python-requests/2.21.0"
  },
  ...
}
This is the output of the example.
Текст ответа
Если мы посмотрим на файл (это работает для текстовых данных, таких как просматриваемая нами страница HTML), мы увидим весь код HTML, требуемый для построения домашней страницы Scotch. Рендеринг выполняться не будет, но мы увидим, что он принадлежит Scotch. Если вы сохраните этот код в файл и откроете его, вы увидите что-то похожее на сайт Scotch. В реальных условиях для загрузки на одну веб-страницу изображений, скриптов, таблиц стилей и т. д. отправляется несколько запросов, так что если вы сохраните в файл только код HTML и откроете его в браузере, результат не будет похож на страницу Scotch.io, поскольку для получения данных HTML был отправлен только один запрос.
script.py

Более сложные POST запросы
Зачастую вы хотите послать некоторые данные также как это делается в HTML форме. Чтобы сделать это, просто передайте соответствующий словарь в аргументе . Ваш словарь данных в таком случае будет автоматически закодирован как HTML форма, когда будет сделан запрос:
>>> payload = {'key1': 'value1', 'key2': 'value2'}
>>> r = requests.post("http://httpbin.org/post", data=payload)
>>> print(r.text)
{ ... "form": { "key2": "value2", "key1": "value1" }, ... }
Но есть много случаев, когда вы можете захотеть отправить данные, которые не закодированы методом . Если вы передадите в запрос строку вместо словаря, то данные будут отправлены в неизменном виде. Например, API v3 GitHub принимает JSON-закодированные данные:
>>> import json url = 'https://api.github.com/some/endpoint'
>>> payload = {'some': 'data'}
>>> r = requests.post(url, data=json.dumps(payload))
PHP POST request in Slim
In the following example, we are going to process a POST request in the Slim
framework.
public/index.php
<?php
use Psr\Http\Message\ResponseInterface as Response;
use Psr\Http\Message\ServerRequestInterface as Request;
use Slim\Factory\AppFactory;

require __DIR__ . '/../vendor/autoload.php';

$app = AppFactory::create();

$app->post('/', function (Request $request, Response $response): Response {

    $data = $request->getParsedBody();

    $name = $data;
    $message = $data;

    if ($name == null) {
        $name = 'guest';
    }

    if ($message == null) {
        $message = 'hello there';
    }

    $output = "$name says: $message";

    $response->getBody()->write($output);
    return $response;
});

$app->run();
We get the POST parameters and return a response in Slim.
$data = $request->getParsedBody();
The POST parameters are retrieved with .
$ php -S localhost:8000 -t public
We start the server.
$ curl -d "name=Lucia" localhost:8000
Lucia says: hello there
We generate a POST request with curl.
HTTP-коды состояний
Первые данные, которые мы получим посредством Response, будут коды состояния. Они сообщают о статусе нашего запроса.
К примеру, статус 200 OK означает, что запрос был успешно выполнен. А известная всем ошибка 404 NOT FOUND скажет нам, что запрашиваемый ресурс найден не был. Таких статусных информационных кодов существует довольно много.
Давайте с помощью .status_code, увидим код состояния, возвращаемый с сервера.
    >>> response.status_code
200
В нашем случае .status_code вернул 200, что означает успешно выполненный запрос.
Кстати, иногда полученная информация используется при написании кода:
    if response.status_code == 200
    print('Success!')
elif response.status_code == 404
    print('Not Found.')
Редиректы и история
По умолчанию будет выполнять редиректы для всех HTTP методов, кроме . Мы можем использовать свойство объекта , чтобы отслеживать редиректы. Список содержит объекты , которые были созданы во время выполнения запроса. Список сортируется от более ранних к более поздним ответам.
Например, GitHub перенаправляет все HTTP запросы на HTTPS:
>>> r = requests.get('http://github.com')
>>> r.url 'https://github.com/'
>>> r.status_code
200
>>> r.history
>]
Если вы используете , , , , или , вы можете отключить обработку редиректов с помощью параметра :
>>> r = requests.get('http://github.com', allow_redirects=False)
>>> r.status_code
301
>>> r.history
[]
Если вы используете , вы можете включить обработку редиректов:
>>> r = requests.head('http://github.com', allow_redirects=True)
>>> r.url 'https://github.com/'
>>> r.history
>]
Python process GET request in Flask
The following example shows how to process a GET request in a Flask application.
app.py
#!/usr/bin/python

from flask import Flask, request

app = Flask(__name__)


@app.route('/')
def index():

    return 'Home page'


@app.route('/greet', methods=)
def greet():

    name = request.args.get('name', 'Guest')
    msg = f'Hello {name}'

    return msg, 200, {'Content-Type': 'text/plain; charset=utf-8'}
The application creates and sends a message to the client. It uses the value
from the name query parameter.
@app.route('/greet', methods=)
def greet():
...
The function is mapped to the
path and the GET type request.
$ export FLASK_APP=app.py
$ flask run
We run the application.
$ curl -i localhost:5000/greet?name=Lucia
HTTP/1.0 200 OK
Content-Type: text/plain; charset=utf-8
Content-Length: 11
Server: Werkzeug/1.0.0 Python/3.8.3
Date: Mon, 20 Jul 2020 13:37:38 GMT

Hello Lucia
We create a GET request to the application using the tool.
With the option, we also include the response header.