Прижать футер к низу окна браузера
Содержание:
- HTML CSS Mobile Responsive Footer
- CSS Only Footer Example
- Position:absolute
- Menus
- Attributes
- Attributes
- How to style <footer> tag?
- Images
- Флексбоксы
- Responsive Footer HTML CSS Only
- Pure CSS Footer Design Example
- How to style tag?
- Examples
- Footer Examples with Menu and Social Media
- More
- 20 Amazing Footer with HTML CSS Design Examples with Source Code
- Подготовка полигона для испытаний
- Добавление значков социальных сетей
- Добавление и оформление контента футера
This footer menu format is the cutting edge layout that is uniquely intended for the business association. It has each area that should be in the footer segment of the business association. The most significant part is the task that the business association has achieved. We can see the footer comprise of the menu, a short portrayal and furthermore the location board.
The web based life catches make it all the more engaging and material. This causes the customer to interface with a business association. The structure and the pertinent capacity makes it, considerably progressively, usable into the venture.
This plan gives the full contact detail, short depiction similarly as online life catch makes this design completely appropriate. This model has a guide of the association area so it makes simpler for its customer to locate the physical area of the association. This footer gives the required part in an essential way among footer models. This footer is common footer which keeps the customer invigorated on the site activities or events.
This kind of layout is valuable for an association whose customer needs to visit the area. This bootstrap footer gives the required element in a basic manner among footer models.
Position:absolute
Предупреждение: данный способ годится только для футеров фиксированной высоты (для блока footer определено свойство height)!
style.css
CSS
footer{
height:50px;
}
|
1 2 3 |
footer{ height50px; } |
Выдернем футер из общего потока контента и спозиционируем его абсолютно, причем позиционировать будем относительно нашей обертки (), а точнее ее левого нижнего угла. Если мы абсолютно спозиционируем футер относительно самого окна браузера, он, конечно, прилипнет к низу, а вот отлепить его обратно будет уже проблематично. Даже когда контент начнет занимать всю страницу.
style.css
CSS
.wrapper{
position:relative;
}
footer{
position:absolute;
left:0;
bottom:0;
}
|
1 2 3 4 5 6 7 8 |
.wrapper{ positionrelative; } footer{ positionabsolute; left; bottom; } |
Что произошло? Да в общем ничего, за исключением того, что ширина футера уменьшилась до ширины его содержимого, а сам он наполз на контент главного блока. Чтобы исправить это пропишем футеру 100% ширину, а блоку main нижний паддинг (отступ).
style.css
CSS
footer{
width:100%;
}
main{
padding-bottom:50px;
}
|
1 2 3 4 5 6 |
footer{ width100%; } main{ padding-bottom50px; } |
При этом 100% будут браться от ширины блока , так как наш футер спозиционирован относительно него. Однако, проблема по-прежнему не решена: футер парит высоко над землей. Логика подсказывает, что необходимо каким-то образом вытянуть наш шаблон на всю высоту экрана, но при этом не добавляя контент. Справиться с этой задачей поможет свойство минимальной ширины:
style.css
CSS
.wrapper{
min-height: 100%;
}
|
1 2 3 |
.wrapper{ min-height100%; } |
Ничего же не изменилось! — возмутитесь вы, и будете правы. Да, мы строго-настрого приказали блоку wrapper растянуться минимум на 100% от высоты доступной ему области. Однако, мы забыли, что этот блок находится внутри тела нашего документа — тега , а тот, в свою очередь, внутри , которым никто не потрудился сообщить о том, что следует занять всю доступную высоту. Понаблюдать за этой связью мы можем, назначив любую высоту, например:
style.css
CSS
body{
height: 600px;
}
|
1 2 3 |
body{ height600px; } |
Прогресс налицо — футер уполз вниз. Теперь просто задаем и 100%-ную высоту и радуемся прилипшему футеру.
style.css
CSS
html{
height:100%;
}
body{
width:900px;margin: 0 auto;
height:100%;
}
|
1 2 3 4 5 6 7 |
html{ height100%; } body{ width900px;marginauto; height100%; } |
Menus
Icon BarMenu IconAccordionTabsVertical TabsTab HeadersFull Page TabsHover TabsTop NavigationResponsive TopnavNavbar with IconsSearch MenuSearch BarFixed SidebarSide NavigationResponsive SidebarFullscreen NavigationOff-Canvas MenuHover Sidenav ButtonsSidebar with IconsHorizontal Scroll MenuVertical MenuBottom NavigationResponsive Bottom NavBottom Border Nav LinksRight Aligned Menu LinksCentered Menu LinkEqual Width Menu LinksFixed MenuSlide Down Bar on ScrollHide Navbar on ScrollShrink Navbar on ScrollSticky NavbarNavbar on ImageHover DropdownsClick DropdownsCascading DropdownDropdown in TopnavDropdown in SidenavResp Navbar DropdownSubnavigation MenuDropupMega MenuMobile MenuCurtain MenuCollapsed SidebarCollapsed SidepanelPaginationBreadcrumbsButton GroupVertical Button GroupSticky Social BarPill NavigationResponsive Header
Attributes
Attributes can be added to an HTML element to provide more information about how the element should appear or behave.
The element accepts the following attributes.
| Attribute | Description |
|---|---|
| None |
Global Attributes
The following attributes are standard across all HTML elements. Therefore, you can use these attributes with the tag , as well as with all other HTML tags.
For a full explanation of these attributes, see HTML 5 global attributes.
Event Handlers
Event handler content attributes enable you to invoke a script from within your HTML. The script is invoked when a certain «event» occurs. Each event handler content attribute deals with a different event.
Most event handler content attributes can be used on all HTML elements, but some event handlers have specific rules around when they can be used and which elements they are applicable to.
For more detail, see HTML event handler content attributes.
Attributes
The <footer> tag supports the Global Attributes and the Event Attributes.
- CSS font-style property sets the style of the font. normal | italic | oblique | initial | inherit.
- CSS font-family property specifies a prioritized list of one or more font family names and/or generic family names for the selected element.
- CSS font-size property sets the size of the font.
- CSS font-weight property defines whether the font should be bold or thick.
- CSS text-transform property controls text case and capitalization.
- CSS text-decoration property specifies the decoration added to text, and is a shorthand property for text-decoration-line, text-decoration-color, text-decoration-style.
- CSS color property describes the color of the text content and text decorations.
- CSS background-color property sets the background color of an element.
- CSS text-indent property specifies the indentation of the first line in a text block.
- CSS text-overflow property specifies how overflowed content that is not displayed should be signalled to the user.
- CSS white-space property specifies how white-space inside an element is handled.
- CSS word-break property specifies where the lines should be broken.
- CSS text-shadow property adds shadow to text.
- CSS text-align-last property sets the alignment of the last line of the text.
- CSS line-height property specifies the height of a line.
- CSS letter-spacing property defines the spaces between letters/characters in a text.
- CSS word-spacing property sets the spacing between words.
Images
SlideshowSlideshow GalleryModal ImagesLightboxResponsive Image GridImage GridTab GalleryImage Overlay FadeImage Overlay SlideImage Overlay ZoomImage Overlay TitleImage Overlay IconImage EffectsBlack and White ImageImage TextImage Text BlocksTransparent Image TextFull Page ImageForm on ImageHero ImageBlur Background ImageChange Bg on ScrollSide-by-Side ImagesRounded ImagesAvatar ImagesResponsive ImagesCenter ImagesThumbnailsBorder Around ImageMeet the TeamSticky ImageFlip an ImageShake an ImagePortfolio GalleryPortfolio with FilteringImage ZoomImage Magnifier GlassImage Comparison Slider
Флексбоксы
На самом деле, таблицы — не самый лучший инструмент для верстки сайтов. Просто потому, что предназначены они для другого
Но принимая во внимание отсутствие специального инструмента, приходилось как-то крутиться. Теперь же этот инструмент есть и поддерживается он уже почти всеми браузерами
Это флексбоксы. С их помощью решение проблемы «липкого футера» осуществляется очень просто и очень изящно:
style.css
CSS
html, body{
height:100%;
}
.wrapper {
display: flex;
min-height: 100%;
flex-direction: column;
}
main {
flex: 1;
}
|
1 2 3 4 5 6 7 8 9 10 11 |
html, body{ height100%; } .wrapper { displayflex; min-height100%; flex-directioncolumn; } main { flex1; } |
Вот и вся хитрость «липкого» футера.
Верстайте с удовольствием!
This footer menu is extraordinarily intended for the E-Commerce site. It is on the grounds that these kind of site needs bunches of data to be appeared at the footer menu. This gives loads of parts to demonstrate data. This is one of the examples of fixed footer using css. The little portrayal, menu list, class area, and installment strategies are available in this footer menu. These are the significant pieces of the E-Commerce site with the goal that it offers simplicity to clients. You will likewise be furnished with the information exchange choice.
The spotless and alluring plan makes this format far and away superior additionally the route menu will support the client.
The one we have here is a very not quite the same as the remainder of the ones we have experienced till now. The movement says everything. When we simply observe the structure it looks essential and straightforward. Be that as it may, soon after we float the mouse where it says to, the footer configuration shows up. This can be a nice bootstrap/css footer examples on the bottom. The foundation shading, the structures everything looks elegant and energizing.
The plan is very magnificent to utilize and can be utilized in practically all sort of sites. For the demo and the codes, you can click underneath.
How to style tag?
- CSS font-style property sets the style of the font. normal | italic | oblique | initial | inherit.
- CSS font-family property specifies a prioritized list of one or more font family names and/or generic family names for the selected element.
- CSS font-size property sets the size of the font.
- CSS font-weight property defines whether the font should be bold or thick.
- CSS text-transform property controls text case and capitalization.
- CSS text-decoration property specifies the decoration added to text, and is a shorthand property for text-decoration-line, text-decoration-color, text-decoration-style.
- CSS color property describes the color of the text content and text decorations.
- CSS background-color property sets the background color of an element.
- CSS text-indent property specifies the indentation of the first line in a text block.
- CSS text-overflow property specifies how overflowed content that is not displayed should be signalled to the user.
- CSS white-space property specifies how white-space inside an element is handled.
- CSS word-break property specifies where the lines should be broken.
Examples
Basic tag usage
Here’s an example of the tag being used to markup the footer of a whole document.
<!doctype html>
<html>
<head>
<title>Page title…</title>
</head>
<body>
<header>
<h1>Heading</h1>
<b><p>Header content…</p></b>
</header>
<nav>
Nav content…
</nav>
<main>
<article>
<p>Article content…</p>
</article>
</main>
<footer>
Footer content…
</footer>
</body>
</html>
The tag doesn’t necessarily need to appear at the bottom of the document (although this is probably the most common usage).
Here’s an example of placing the tag near the top of the document.
<!doctype html>
<html>
<head>
<title>Page title…</title>
</head>
<body>
<footer>
Footer content…
</footer>
<main>
<article>
<p>Article content…</p>
</article>
</main>
</body>
</html>
Multiple Elements
A document can have multiple elements. Here’s an example of a document with two footers (one at the top and one at the bottom).
<!doctype html>
<html>
<head>
<title>Page title…</title>
</head>
<body>
<footer>
<a href=»/»>Home</a>
</footer>
<main>
<article>
<p>Article content…</p>
</article>
</main>
<footer>
<a href=»/»>Home</a>
</footer>
</body>
</html>
Just as a whole document can contain elements, so can each section within a document.
Here, we have two elements that contain their own respective footers. The document itself has its own separate footer.
<!doctype html>
<html>
<head>
<title>Page title…</title>
</head>
<body>
<main>
<article>
<p>Article content…</p>
<footer>
Footer content…
</footer>
</article>
<article>
<p>Article content…</p>
<footer>
Footer content…
</footer>
</article>
</main>
<footer>
Footer content…
</footer>
</body>
</html>
Addresses
Footers often contain contact information for the document’s author. Contact information within a tag should be marked up using the tag.
<!doctype html>
<html>
<head>
<title>Page title…</title>
</head>
<body>
<main>
<article>
<p>Article content…</p>
</article>
</main>
<footer>
<address>
Contact: <a href=»mailto:homer@example.com»>Homer Shakespeare</a>
</address>
</footer>
</body>
</html>
This footer menu organization is the front line design that is interestingly expected for the business affiliation. It has every region that ought to be in the footer section of the business affiliation. The most noteworthy part is the assignment that the business affiliation has accomplished. This is one of the examples of fixed footer using css. We can see the footer involve the menu, a short depiction and besides the area board.
The usage of HTML similarly as CSS improves this footer model for customers to fuse into the assignment. On further customization we can make it as a css sticky footer as well. The organization of this design is unblemished and engaging.
More
Fullscreen VideoModal BoxesDelete ModalTimelineScroll IndicatorProgress BarsSkill BarRange SlidersTooltipsDisplay Element HoverPopupsCollapsibleCalendarHTML IncludesTo Do ListLoadersStar RatingUser RatingOverlay EffectContact ChipsCardsFlip CardProfile CardProduct CardAlertsCalloutNotesLabelsCirclesStyle HRCouponList GroupList Without BulletsResponsive TextCutout TextGlowing TextFixed FooterSticky ElementEqual HeightClearfixResponsive FloatsSnackbarFullscreen WindowScroll DrawingSmooth ScrollGradient Bg ScrollSticky HeaderShrink Header on ScrollPricing TableParallaxAspect RatioResponsive IframesToggle Like/DislikeToggle Hide/ShowToggle Dark ModeToggle TextToggle ClassAdd ClassRemove ClassActive ClassTree ViewRemove PropertyOffline DetectionFind Hidden ElementRedirect WebpageZoom HoverFlip BoxCenter VerticallyCenter Button in DIVTransition on HoverArrowsShapesDownload LinkFull Height ElementBrowser WindowCustom ScrollbarHide ScrollbarShow/Force ScrollbarDevice LookContenteditable BorderPlaceholder ColorText Selection ColorBullet ColorVertical LineDividersAnimate IconsCountdown TimerTypewriterComing Soon PageChat MessagesPopup Chat WindowSplit ScreenTestimonialsSection CounterQuotes SlideshowClosable List ItemsTypical Device BreakpointsDraggable HTML ElementJS Media QueriesSyntax HighlighterJS AnimationsJS String LengthJS ExponentiationJS Default ParametersGet Current URLGet Current Screen SizeGet Iframe Elements
We can take many examples of footers like responsive footer, fixed footer, sticky footer, bootstrap footer. So in this article we will be talking about some of the greatest and most used amazing footers of all times.
Related
- Creative Website Footer UI Design
- Beautiful Bootstrap Footer Templates
- React Sticky Header Elements on Scroll
- Bootstrap Header Templates
- Website Header Design Concept
To assist the fashioners with the wonderful structures of the footer, we have arranged a rundown wherein numerous instances of the footer is available and the planner just can take a reference from them. They are as pursue.
Подготовка полигона для испытаний
Набросаем простенькую страничку, на которой будем экспериментировать:
index.html
<!DOCTYPE html>
<html lang=»ru»>
<head>
<meta charset=»utf-8″>
<title>Document</title>
<link rel=»stylesheet» href=»style.css»>
</head>
<body>
<div class=»wrapper»>
<header>
<h1>HEADER — HEADER</h1>
</header>
<main>
<p>Lorem ipsum dolor sit amet, consectetur adipisicing elit. Praesentium molestias nulla neque omnis eaque ad perspiciatis cum mollitia excepturi sit. Amet, totam velit fugiat sunt voluptatum incidunt reprehenderit earum animi.</p>
<p>Sit excepturi natus velit laborum adipisci deserunt quasi veniam, pariatur non aspernatur fuga beatae dolorum cupiditate commodi maxime, id eligendi laboriosam molestiae iusto dignissimos ea et error assumenda architecto! Eos.</p>
<p>Perferendis animi totam, vel at reprehenderit veniam assumenda consequuntur perspiciatis similique. Eum repellat minus sed dolorem molestias, aperiam debitis hic! Quis obcaecati delectus iusto amet atque veritatis incidunt aspernatur temporibus.</p>
<p>Pariatur id ut obcaecati expedita, impedit ipsa error repudiandae fuga harum, saepe ratione perspiciatis recusandae! Hic numquam, beatae fuga laborum id illum voluptates voluptatibus ex deleniti mollitia nesciunt temporibus consequatur.</p>
</main>
<footer>
<h2>FOOTER — FOOTER</h2>
</footer>
</div>
</body>
</html>
|
1 2 3 4 5 6 7 8 9 10 11 12 13 14 15 16 17 18 19 20 21 22 23 24 |
<!DOCTYPE html> <html lang=»ru»> <head> <meta charset=»UTF-8″> <title>Document<title> <link rel=»stylesheet»href=»style.css»> <head> <body> <div class=»wrapper»> <header> <h1>HEADER-HEADER<h1> <header> <main> <p>Lorem ipsum dolor sit amet,consectetur adipisicing elit.Praesentium molestias nulla neque omnis eaque ad perspiciatis cum mollitia excepturi sit.Amet,totam velit fugiat sunt voluptatum incidunt reprehenderit earum animi.<p> <p>Sit excepturi natus velit laborum adipisci deserunt quasi veniam,pariatur non aspernatur fuga beatae dolorum cupiditate commodi maxime,id eligendi laboriosam molestiae iusto dignissimos ea et error assumenda architecto!Eos.<p> <p>Perferendis animi totam,vel at reprehenderit veniam assumenda consequuntur perspiciatis similique.Eum repellat minus sed dolorem molestias,aperiam debitis hic!Quis obcaecati delectus iusto amet atque veritatis incidunt aspernatur temporibus.<p> <p>Pariatur id ut obcaecati expedita,impedit ipsa error repudiandae fuga harum,saepe ratione perspiciatis recusandae!Hic numquam,beatae fuga laborum id illum voluptates voluptatibus ex deleniti mollitia nesciunt temporibus consequatur.<p> <main> <footer> <h2>FOOTER-FOOTER<h2> <footer> <div> <body> <html> |
И зададим для нее такие же простенькие стили:
style.css
CSS
*{
margin: 0;padding: 0;
}
body{
width:900px;margin: 0 auto;
}
.wrapper{
border:2px dotted black;
}
header{
background: black;color:white;text-align: center;
}
main{
background: #eee;
}
footer{
background: #ffa;text-align: center;
}
|
1 2 3 4 5 6 7 8 9 10 11 12 13 14 15 16 17 18 |
*{ margin;padding; } body{ width900px;marginauto; } .wrapper{ border2pxdottedblack; } header{ backgroundblack;colorwhite;text-aligncenter; } main{ background#eee; } footer{ background#ffa;text-aligncenter; } |
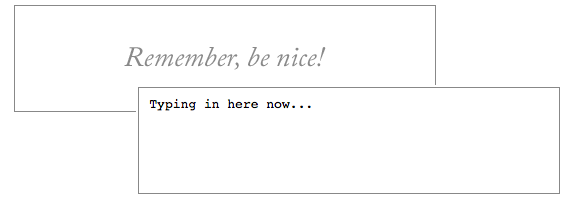
Пока что это простое украшательство, мы добавили обертке штриховую рамку и раскрасили основные блоки — , и , чтобы проще их различать. Текущий результат не очень впечатляет, правда?)
Футер висит где-то высоко над землей, а мы очень хотим его к этой земле приклеить.
Добавление значков социальных сетей
Давайте добавим в наш футер значки социальных сетей, которые можно использовать для ссылки на свои учетные записи. Если вы хотите использовать значки для других соцсетей, вы можете найти их бесплатные логотипы в Интернете и загрузить их в папку images, а затем добавить на свою страницу. Откройте styles.css и вставьте следующие три набора правил в конец файла:
Остановимся на этих правилах подробнее:
- Первый набор правил определяет класс footer-content-right и присваивает определенные значения его внутренним полям, внешним отступам и выравниванию (padding, margin и float соответственно). Этот набор правил нужен для стилизации элемента <div>, который будет содержать значки социальных сетей.
- Второй набор создает класс icon-style, который задает высоту и внешние поля для значков социальных сетей, учитывая их размер и расположение.
- Третий набор правил использует псевдокласс hover, что изменит цвет фона значка на желтый при наведении курсора.
Сохраните файл styles.css. Теперь давайте добавим значки в футер. Вернитесь в свой файл index.html и добавьте следующий фрагмент кода после последнего закрывающего тега </a>:
Примечание: Не забудьте заменить нашу ссылку в коде ссылками на свои соцсети. При необходимости откорректируйте пути к файлам.
Этот фрагмент кода создает контейнер <div>, которому присваивается класс footer-content-right. Внутри этого контейнера div находятся три значка социальных сетей, вставленные с помощью HTML-тега <img>; с помощью тега HTML <a> каждое изображение поддерживает ссылку на соответствующую соцсеть.
Также мы добавили атрибут alt – это альтернативный текст, описывающий каждый значок. При создании веб-сайтов альтернативный текст следует добавлять ко всем изображениям, чтобы обеспечить доступность сайта для людей, использующих скринридеры. Чтобы узнать больше об использовании альтернативного текста с HTML, читайте мануал Добавление изображения на веб-страницу с помощью HTML.
Сохраните файл index.html и перезагрузите его в браузере. Теперь на вашей странице должен быть зафиксированный футер, содержащий в правой части ссылки на ваши социальные сети. Ссылки должны менять цвет фона при наведении на них курсора.
Добавление и оформление контента футера
Следующим шагом будет добавление и стилизация элементов меню в левой части футера. Эти пункты меню можно использовать для ссылки на другие страницы вашего сайта. В настоящее время на нашем сайте есть только одна страница, поэтому вы можете использовать условные ссылки. Если позже вы создадите новые страницы для вашего сайта, вы сможете добавить в футер новые пункты меню и прикрепить правильные ссылки.
Вернитесь к styles.css и добавьте следующий фрагмент кода в конец файла:
Давайте подробно рассмотрим каждый из созданных нами наборов правил:
Первый набор определяет класс footer-text-left, который будет использоваться для стилизации текста меню
Обратите внимание, свойство float имеет значение left – следовательно, текст, оформленный по этому классу, будет размещен в левой части страницы. Свойство word-spacing предоставляет дополнительное пространство между элементами меню
Однако если какой-либо из пунктов вашего меню состоит из более чем одного слова, вам нужно создать класс для стилизации пунктов меню (недостаточно просто изменить значение интервала между словами).
Второй набор правил использует псевдокласс hover, чтобы сделать желтым цвет фона того текста, на который пользователь наводит курсор.
Теперь давайте пропишем в файле index.html пункты меню. Вставьте следующий выделенный фрагмент кода в контейнер footer, который вы создали ранее:
Этот фрагмент кода добавляет два элемента меню (about и credits), связывает эти элементы и стилизует текст с помощью только что созданных классов footer-text-left и a.menu.
Сохраните оба файла и перезагрузите веб-страницу в браузере. В левой части закрепленного футера появится три пункта меню: home, about и credits. При наведении на них фон будет менять свой цвет на желтый.